Delphi Programming / Object Pascal Delphi サンプルプログラム集
050_TStringGrid とカスタム描画
動作確認等
Windows 7 U64(SP1) + Delphi XE(UP1) Pro
050_TStringGrid_OnDrawCell.zip [16,888 KB] 2020年01月13日版 (EXE 同梱)
Windows XP から Windows XP テーマというのが導入されました。また Vista 以降では、Windows Aero というテーマが採用されています。
TStringGrid にはない機能を補うものとして、上記リンクの Project.JEDI の TJvStringGrid も検討する価値があるのではないかと思います。
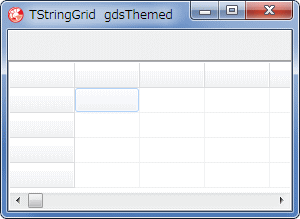
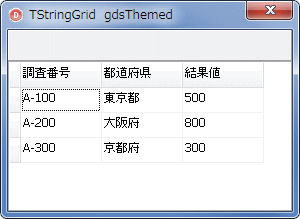
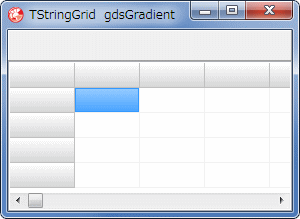
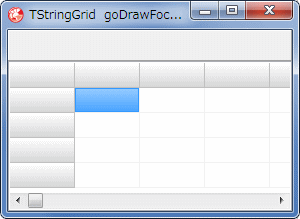
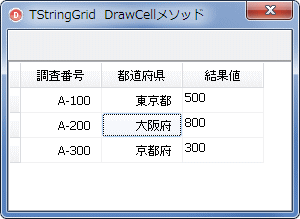
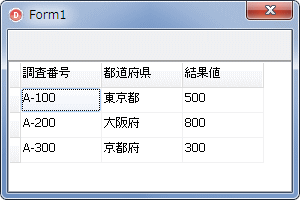
フォームに TStringGrid を配置して、固定列の幅を変更しただけのテストプログラムです。つまり、他のプロパティはデフォルトの値のままですが、念のため、フォームの OnCreate で設定しています。
図1
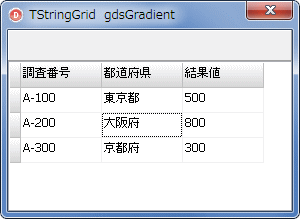
図2
リスト1
copy code
unit Unit1;interface uses Windows, Messages, SysUtils, Variants, Classes, Graphics, Controls, Forms,
Dialogs, ExtCtrls, Grids;
type TForm1 = class (TForm)
StringGrid1: TStringGrid;
Panel1: TPanel;
procedure FormCreate(Sender: TObject);procedure StringGrid1DrawCell(Sender: TObject; ACol, ARow: Integer;Rect: TRect; State: TGridDrawState);
private { Private 宣言 } public { Public 宣言 } end ;var Form1: TForm1;
implementation {$R *.dfm} // =============================================================================// テスト用に列数と列幅等を設定し、テスト用のデータを各セルにセット// =============================================================================procedure TForm1.FormCreate(Sender: TObject);begin StringGrid1.DefaultDrawing := True;
StringGrid1.DrawingStyle := gdsThemed;
StringGrid1.FixedCols := 1 ;
StringGrid1.FixedRows := 1 ;
StringGrid1.ColCount := 4 ;
StringGrid1.RowCount := 4 ;
StringGrid1.DefaultColWidth := 80 ;
// 左端の列幅設定StringGrid1.ColWidths[0 ] := 10 ;
// テスト用の値をセット(固定行)StringGrid1.Cells[1 ,0 ] := '調査番号' ;
StringGrid1.Cells[2 ,0 ] := '都道府県' ;
StringGrid1.Cells[3 ,0 ] := '結果値' ;
// テスト用の値をセットStringGrid1.Cells[1 ,1 ] := 'A-100' ;
StringGrid1.Cells[1 ,2 ] := 'A-200' ;
StringGrid1.Cells[1 ,3 ] := 'A-300' ;
StringGrid1.Cells[2 ,1 ] := '東京都' ;
StringGrid1.Cells[2 ,2 ] := '大阪府' ;
StringGrid1.Cells[2 ,3 ] := '京都府' ;
StringGrid1.Cells[3 ,1 ] := '500' ;
StringGrid1.Cells[3 ,2 ] := '800' ;
StringGrid1.Cells[3 ,3 ] := '300' ;
end ;// =============================================================================// OnDrawCellイベント// =============================================================================procedure TForm1.StringGrid1DrawCell(Sender: TObject; ACol, ARow: Integer;Rect: TRect; State: TGridDrawState);
begin // end ;end .
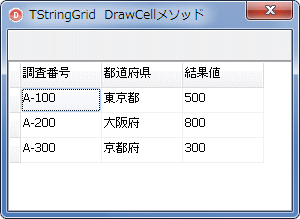
上のサンプルの OnDrawCell イベントには描画コードは 1 行もありません。しかし、セルに代入した文字列が表示、描画されています。つまり、セルに値を代入していれば、OnDrawCell イベントに描画コードがなくても文字列は描画されます。
このことは、OnDrawCell イベント内に別の描画コードを書いた場合、デフォルトの描画も行われることを意味しています。つまり、デフォルトの描画と、追加した描画コードによる描画の重ね描画となります。つまり、二重に描画されることになります。
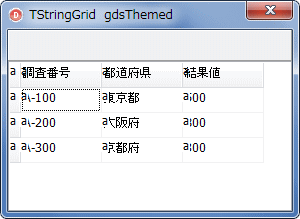
例えば、次のコードは、上のサンプルの OnDrawCell イベント内に、全てのセルに小文字の a を描画するコードを追加した例です。セルに代入した文字列が描画されていることが分かります。追加で描画する文字列 a は、デフォルトの描画の後に描画されます。
図3
本来の描画と OnDrawCell イベントで描画した異様が重なっている (二重描画)
copy code
procedure TForm1.StringGrid1DrawCell(Sender: TObject; ACol, ARow: Integer;Rect: TRect; State: TGridDrawState);
begin StringGrid1.Canvas.TextOut(Rect.Left, Rect.Top, 'a' );
end ;
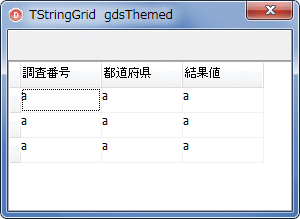
追加の描画だけにしたい場合は、後述のように、TStringGrid の継承クラスを作成して、DrawCell メソッドで全ての描画を実行するか、以下のコードのように、OnDrawCell イベント内で TStringGrid のセルの背景を塗り潰す必要があります。塗り潰したその上に文字列や画像を描画します。
OnDrawCell イベントは、セルの描画が必要になると実行されます。どのセルが描画されるのかは、イベントの引数の ACol, ARow で知ることができます。
図4
copy code
procedure TForm1.StringGrid1DrawCell(Sender: TObject; ACol, ARow: Integer;Rect: TRect; State: TGridDrawState);
begin // 固定セルでなければif not (gdFixed in State) then begin // 塗り潰しStringGrid1.Canvas.FillRect(Rect);
StringGrid1.Canvas.TextOut(Rect.Left, Rect.Top, 'a' );
end ;end ;
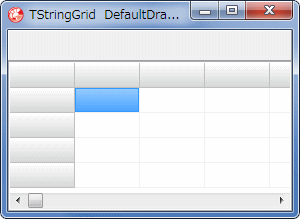
DrawingStyle プロパティの値を gdsGradient にした場合です。
図5
図6
リスト2
copy code
unit Unit1;interface uses Windows, Messages, SysUtils, Variants, Classes, Graphics, Controls, Forms,
Dialogs, ExtCtrls, Grids;
type TForm1 = class (TForm)
StringGrid1: TStringGrid;
Panel1: TPanel;
procedure FormCreate(Sender: TObject);procedure StringGrid1DrawCell(Sender: TObject; ACol, ARow: Integer;Rect: TRect; State: TGridDrawState);
private { Private 宣言 } public { Public 宣言 } end ;var Form1: TForm1;
implementation {$R *.dfm} // =============================================================================// テスト用に列数と列幅等を設定し、テスト用のデータを各セルにセット// =============================================================================procedure TForm1.FormCreate(Sender: TObject);begin StringGrid1.DefaultDrawing := True;
StringGrid1.DrawingStyle := gdsGradient;
StringGrid1.FixedCols := 1 ;
StringGrid1.FixedRows := 1 ;
StringGrid1.ColCount := 4 ;
StringGrid1.RowCount := 4 ;
StringGrid1.DefaultColWidth := 80 ;
// 左端の列幅設定StringGrid1.ColWidths[0 ] := 10 ;
// テスト用の値をセット(固定行)StringGrid1.Cells[1 ,0 ] := '調査番号' ;
StringGrid1.Cells[2 ,0 ] := '都道府県' ;
StringGrid1.Cells[3 ,0 ] := '結果値' ;
// テスト用の値をセットStringGrid1.Cells[1 ,1 ] := 'A-100' ;
StringGrid1.Cells[1 ,2 ] := 'A-200' ;
StringGrid1.Cells[1 ,3 ] := 'A-300' ;
StringGrid1.Cells[2 ,1 ] := '東京都' ;
StringGrid1.Cells[2 ,2 ] := '大阪府' ;
StringGrid1.Cells[2 ,3 ] := '京都府' ;
StringGrid1.Cells[3 ,1 ] := '500' ;
StringGrid1.Cells[3 ,2 ] := '800' ;
StringGrid1.Cells[3 ,3 ] := '300' ;
end ;// =============================================================================// OnDrawCellイベント// =============================================================================procedure TForm1.StringGrid1DrawCell(Sender: TObject; ACol, ARow: Integer;Rect: TRect; State: TGridDrawState);
begin // end ;end .
03_ DefaultDrawing が False の場合
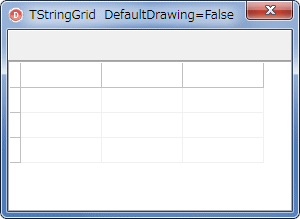
DefaultDrawing プロパティを False にしたテストです。
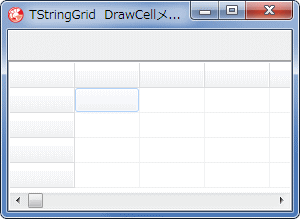
図7
図8
OnDrawCell イベントに描画コードがないので、何も表示しない
行と列数だけは設定できている
リスト3
copy code
unit Unit1;interface uses Windows, Messages, SysUtils, Variants, Classes, Graphics, Controls, Forms,
Dialogs, ExtCtrls, Grids;
type TForm1 = class (TForm)
StringGrid1: TStringGrid;
Panel1: TPanel;
procedure FormCreate(Sender: TObject);procedure StringGrid1DrawCell(Sender: TObject; ACol, ARow: Integer;Rect: TRect; State: TGridDrawState);
private { Private 宣言 } public { Public 宣言 } end ;var Form1: TForm1;
implementation {$R *.dfm} // =============================================================================// テスト用に列数と列幅等を設定し、テスト用のデータを各セルにセット// =============================================================================procedure TForm1.FormCreate(Sender: TObject);begin StringGrid1.DefaultDrawing := False;
StringGrid1.DrawingStyle := gdsGradient;
StringGrid1.FixedCols := 1 ;
StringGrid1.FixedRows := 1 ;
StringGrid1.ColCount := 4 ;
StringGrid1.RowCount := 4 ;
StringGrid1.DefaultColWidth := 80 ;
// 左端の列幅設定StringGrid1.ColWidths[0 ] := 10 ;
// テスト用の値をセット(固定行)StringGrid1.Cells[1 ,0 ] := '調査番号' ;
StringGrid1.Cells[2 ,0 ] := '都道府県' ;
StringGrid1.Cells[3 ,0 ] := '結果値' ;
// テスト用の値をセットStringGrid1.Cells[1 ,1 ] := 'A-100' ;
StringGrid1.Cells[1 ,2 ] := 'A-200' ;
StringGrid1.Cells[1 ,3 ] := 'A-300' ;
StringGrid1.Cells[2 ,1 ] := '東京都' ;
StringGrid1.Cells[2 ,2 ] := '大阪府' ;
StringGrid1.Cells[2 ,3 ] := '京都府' ;
StringGrid1.Cells[3 ,1 ] := '500' ;
StringGrid1.Cells[3 ,2 ] := '800' ;
StringGrid1.Cells[3 ,3 ] := '300' ;
end ;// =============================================================================// OnDrawCellイベント// DefaultDrawingの値がFalseなので、描画コードがないと、何も描画しない// =============================================================================procedure TForm1.StringGrid1DrawCell(Sender: TObject; ACol, ARow: Integer;Rect: TRect; State: TGridDrawState);
begin // end ;end .
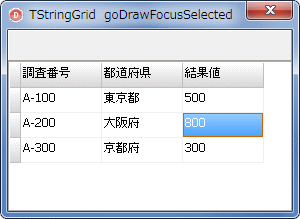
04_ goDrawFocusSelected が True の場合
Options プロパティの goDrawFocusSelected を True にすると、選択セルの背景に色が付きます。この色はシステムが決めています。
図9
図10
リスト4
copy code
unit Unit1;interface uses Windows, Messages, SysUtils, Variants, Classes, Graphics, Controls, Forms,
Dialogs, ExtCtrls, Grids;
type TForm1 = class (TForm)
StringGrid1: TStringGrid;
Panel1: TPanel;
procedure FormCreate(Sender: TObject);procedure StringGrid1DrawCell(Sender: TObject; ACol, ARow: Integer;Rect: TRect; State: TGridDrawState);
private { Private 宣言 } public { Public 宣言 } end ;var Form1: TForm1;
implementation {$R *.dfm} // =============================================================================// テスト用に列数と列幅等を設定し、テスト用のデータを各セルにセット// =============================================================================procedure TForm1.FormCreate(Sender: TObject);begin StringGrid1.DefaultDrawing := True;
StringGrid1.DrawingStyle := gdsGradient;
StringGrid1.Options := StringGrid1.Options + [goDrawFocusSelected];
StringGrid1.FixedCols := 1 ;
StringGrid1.FixedRows := 1 ;
StringGrid1.ColCount := 4 ;
StringGrid1.RowCount := 4 ;
StringGrid1.DefaultColWidth := 80 ;
// 左端の列幅設定StringGrid1.ColWidths[0 ] := 10 ;
// テスト用の値をセット(固定行)StringGrid1.Cells[1 ,0 ] := '調査番号' ;
StringGrid1.Cells[2 ,0 ] := '都道府県' ;
StringGrid1.Cells[3 ,0 ] := '結果値' ;
// テスト用の値をセットStringGrid1.Cells[1 ,1 ] := 'A-100' ;
StringGrid1.Cells[1 ,2 ] := 'A-200' ;
StringGrid1.Cells[1 ,3 ] := 'A-300' ;
StringGrid1.Cells[2 ,1 ] := '東京都' ;
StringGrid1.Cells[2 ,2 ] := '大阪府' ;
StringGrid1.Cells[2 ,3 ] := '京都府' ;
StringGrid1.Cells[3 ,1 ] := '500' ;
StringGrid1.Cells[3 ,2 ] := '800' ;
StringGrid1.Cells[3 ,3 ] := '300' ;
end ;// =============================================================================// OnDrawCellイベント// =============================================================================procedure TForm1.StringGrid1DrawCell(Sender: TObject; ACol, ARow: Integer;Rect: TRect; State: TGridDrawState);
begin // end ;end .
05_ セルのカスタム描画 - 文字列のアライメント ( inherited の意義 )
セルのカスタム描画の例です。このサンプルでは TStringGrid を継承したクラスを作成し、その機能を置き換えて使用しています。作成した継承クラスの DrawCell メソッド は、文字列の描画が必要な時に自動的に実行される関数です。まず、この関数の機能を確認してみます。
継承クラスを使用しない場合、追加の描画コードは OnDrawCell イベント内に書きます。
図11
リスト5
copy code
unit Unit1;interface uses Windows, Messages, SysUtils, Variants, Classes, Graphics, Controls, Forms,
Dialogs, ExtCtrls, Grids;
type TplStringGrid = class (TStringGrid)
protected procedure DrawCell(ACol, ARow: Longint; ARect: TRect;AState: TGridDrawState); override ;
end ;TForm1 = class (TForm)
StringGrid1: TStringGrid;
Panel1: TPanel;
procedure FormCreate(Sender: TObject);private { Private 宣言 } plStringGrid1 : TplStringGrid;
public { Public 宣言 } end ;var Form1: TForm1;
implementation uses plChgCompo;{$R *.dfm} // =============================================================================// テスト用に列数と列幅等を設定し、テスト用のデータを各セルにセット// // ChangeComponentの使用にはusesにplChgCompoが必要(添付)// =============================================================================procedure TForm1.FormCreate(Sender: TObject);begin // フォーム作成時にコンポーネントの入れ替えplStringGrid1 := TplStringGrid(ChangeComponent(StringGrid1, TplStringGrid));
plStringGrid1.DefaultDrawing := True;
plStringGrid1.DrawingStyle := gdsThemed;
plStringGrid1.Options := plStringGrid1.Options + [goDrawFocusSelected];
plStringGrid1.FixedCols := 1 ;
plStringGrid1.FixedRows := 1 ;
plStringGrid1.ColCount := 4 ;
plStringGrid1.RowCount := 4 ;
plStringGrid1.DefaultColWidth := 80 ;
// 左端の列幅設定plStringGrid1.ColWidths[0 ] := 10 ;
// テスト用の値をセット(固定行)plStringGrid1.Cells[1 ,0 ] := '調査番号' ;
plStringGrid1.Cells[2 ,0 ] := '都道府県' ;
plStringGrid1.Cells[3 ,0 ] := '結果値' ;
// テスト用の値をセットplStringGrid1.Cells[1 ,1 ] := 'A-100' ;
plStringGrid1.Cells[1 ,2 ] := 'A-200' ;
plStringGrid1.Cells[1 ,3 ] := 'A-300' ;
plStringGrid1.Cells[2 ,1 ] := '東京都' ;
plStringGrid1.Cells[2 ,2 ] := '大阪府' ;
plStringGrid1.Cells[2 ,3 ] := '京都府' ;
plStringGrid1.Cells[3 ,1 ] := '500' ;
plStringGrid1.Cells[3 ,2 ] := '800' ;
plStringGrid1.Cells[3 ,3 ] := '300' ;
end ;{ TplStringGrid } // =============================================================================// TStgingGridの継承元のDrawCellメソッド// テキストの描画が必要になると自動的に呼び出されて実行する// =============================================================================procedure TplStringGrid.DrawCell(ACol, ARow: Integer; ARect: TRect;AState: TGridDrawState);
begin inherited ;end ;end .
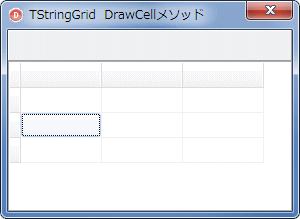
次に、この inherited を削除してみます。下図のようになります。背景だけは描画されています。
継承クラス内の DrawCell メソッド内で描画コードを書く場合、全てを自前でセルの文字列、テキストを描画する必要はありません。必要な行または列だけをカスタム描画し、後は inherited を実行することもできます。
図12
セルの枠線と背景だけは描画される
文字列を自由に描画できることを意味している
継承クラスの DrawCell メソッドに inherited がない場合
copy code
unit Unit1;interface uses Windows, Messages, SysUtils, Variants, Classes, Graphics, Controls, Forms,
Dialogs, ExtCtrls, Grids;
type TplStringGrid = class (TStringGrid)
protected procedure DrawCell(ACol, ARow: Longint; ARect: TRect;AState: TGridDrawState); override ;
end ;TForm1 = class (TForm)
StringGrid1: TStringGrid;
Panel1: TPanel;
procedure FormCreate(Sender: TObject);private { Private 宣言 } plStringGrid1 : TplStringGrid;
public { Public 宣言 } end ;var Form1: TForm1;
implementation uses plChgCompo;{$R *.dfm} // =============================================================================// テスト用に列数と列幅等を設定し、テスト用のデータを各セルにセット// // ChangeComponentの使用にはusesにplChgCompoが必要(添付)// =============================================================================procedure TForm1.FormCreate(Sender: TObject);begin // フォーム作成時にコンポーネントの入れ替えplStringGrid1 := TplStringGrid(ChangeComponent(StringGrid1, TplStringGrid));
plStringGrid1.DefaultDrawing := True;
plStringGrid1.DrawingStyle := gdsThemed;
plStringGrid1.Options := plStringGrid1.Options + [goDrawFocusSelected];
plStringGrid1.FixedCols := 1 ;
plStringGrid1.FixedRows := 1 ;
plStringGrid1.ColCount := 4 ;
plStringGrid1.RowCount := 4 ;
plStringGrid1.DefaultColWidth := 80 ;
// 左端の列幅設定plStringGrid1.ColWidths[0 ] := 10 ;
// テスト用の値をセット(固定行)plStringGrid1.Cells[1 ,0 ] := '調査番号' ;
plStringGrid1.Cells[2 ,0 ] := '都道府県' ;
plStringGrid1.Cells[3 ,0 ] := '結果値' ;
// テスト用の値をセットplStringGrid1.Cells[1 ,1 ] := 'A-100' ;
plStringGrid1.Cells[1 ,2 ] := 'A-200' ;
plStringGrid1.Cells[1 ,3 ] := 'A-300' ;
plStringGrid1.Cells[2 ,1 ] := '東京都' ;
plStringGrid1.Cells[2 ,2 ] := '大阪府' ;
plStringGrid1.Cells[2 ,3 ] := '京都府' ;
plStringGrid1.Cells[3 ,1 ] := '500' ;
plStringGrid1.Cells[3 ,2 ] := '800' ;
plStringGrid1.Cells[3 ,3 ] := '300' ;
end ;{ TplStringGrid } // =============================================================================// TStgingGridの継承元のDrawCellメソッド// テキストの描画が必要になると自動的に呼び出されて実行する// =============================================================================procedure TplStringGrid.DrawCell(ACol, ARow: Integer; ARect: TRect;AState: TGridDrawState);
begin // inherited;end ;end .
実際に DrawCell メソッド内でカスタム描画を行うコード例です。セルの背景の描画はしていません。
図13
固定行の文字列は中央寄せ
1 列目と 2 列目は右寄せ
3 列目はデフォルトの描画
[備考]
リスト6
copy code
unit Unit1;interface uses Windows, Messages, SysUtils, Variants, Classes, Graphics, Controls, Forms,
Dialogs, ExtCtrls, Grids;
type TplStringGrid = class (TStringGrid)
protected procedure DrawCell(ACol, ARow: Longint; ARect: TRect;AState: TGridDrawState); override ;
end ;TForm1 = class (TForm)
StringGrid1: TStringGrid;
Panel1: TPanel;
procedure FormCreate(Sender: TObject);private { Private 宣言 } plStringGrid1 : TplStringGrid;
public { Public 宣言 } end ;var Form1: TForm1;
implementation uses plChgCompo;{$R *.dfm} // =============================================================================// テスト用に列数と列幅等を設定し、テスト用のデータを各セルにセット// // ChangeComponentの使用にはusesにplChgCompoが必要// =============================================================================procedure TForm1.FormCreate(Sender: TObject);begin // フォーム作成時にコンポーネントの入れ替えplStringGrid1 := TplStringGrid(ChangeComponent(StringGrid1, TplStringGrid));
plStringGrid1.DefaultDrawing := True;
plStringGrid1.DrawingStyle := gdsThemed;
plStringGrid1.Options := plStringGrid1.Options + [goDrawFocusSelected];
plStringGrid1.FixedCols := 1 ;
plStringGrid1.FixedRows := 1 ;
plStringGrid1.ColCount := 4 ;
plStringGrid1.RowCount := 4 ;
plStringGrid1.DefaultColWidth := 80 ;
// 左端の列幅設定plStringGrid1.ColWidths[0 ] := 10 ;
// テスト用の値をセット(固定行)plStringGrid1.Cells[1 ,0 ] := '調査番号' ;
plStringGrid1.Cells[2 ,0 ] := '都道府県' ;
plStringGrid1.Cells[3 ,0 ] := '結果値' ;
// テスト用の値をセットplStringGrid1.Cells[1 ,1 ] := 'A-100' ;
plStringGrid1.Cells[1 ,2 ] := 'A-200' ;
plStringGrid1.Cells[1 ,3 ] := 'A-300' ;
plStringGrid1.Cells[2 ,1 ] := '東京都' ;
plStringGrid1.Cells[2 ,2 ] := '大阪府' ;
plStringGrid1.Cells[2 ,3 ] := '京都府' ;
plStringGrid1.Cells[3 ,1 ] := '500' ;
plStringGrid1.Cells[3 ,2 ] := '800' ;
plStringGrid1.Cells[3 ,3 ] := '300' ;
end ;{ TplStringGrid } // =============================================================================// TStgingGridの継承元のDrawCellメソッド// テキストの描画が必要になると自動的に呼び出されて実行する// =============================================================================procedure TplStringGrid.DrawCell(ACol, ARow: Integer; ARect: TRect;AState: TGridDrawState);
var uFmt : Cardinal;
begin // gdFixed(固定行または固定列)の場合if (gdFixed In AState) then begin // アライメンを指定uFmt := DT_CENTER or DT_SINGLELINE or DT_VCENTER;
DrawText(Canvas.Handle, PChar(Cells[ACol, ARow]), -1 , ARect, uFmt);
end else begin // 第3列目はデフォルトの描画とするif ACol = 3 then begin inherited ;end else begin // 右寄せであるが、両端に10ドットの隙間をつけるOffsetRect(ARect, -10 , 0 );
// アライメンを指定uFmt := DT_RIGHT or DT_SINGLELINE or DT_VCENTER;
DrawText(Canvas.Handle, PChar(Cells[ACol, ARow]), -1 , ARect, uFmt);
end ;end ;end ;end .
06_ セルのカスタム描画 - 選択セルの背景色とフォーカスの枠線
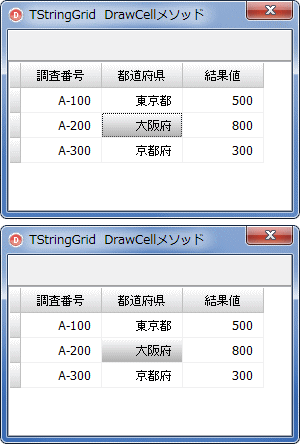
セルの背景の描画も行う例です。ここでは選択セルのみ変更しています。
フォーカスがあるセルのフォーカスの枠線 (フォーカスの四角形) を描画しないようにするには、以下のように DrawFocusRect を実行します。DrawFocusRect は XOR モードで描画するので、もう一度描画すると消去されます。
OnDrawCell イベントでは、このように簡単にはいきません。フォーカスの枠線は、OnDrawCell イベントの後に描画されるからです。TStringGrid の継承クラスを作成して、その継承クラスの DrawCell メソッドを使用すると、描画の細かい制御ができるようになります。
copy code
// 選択状態(gdSelected)のセルの描画if gdSelected in AState then begin // Rectの矩形領域内をグラデーションで塗り潰すGradientFillCanvas(Canvas,
GetShadowColor(clWhite, 0 ),
GetShadowColor(clGray, 45 ),
ARect,
gdVertical);
// フォーカスの枠線を描画したくない場合// ただし、OptionsにgoDrawFocusSelectedが含まれていると無効Canvas.DrawFocusRect(ARect);
end ;
[備考]
図14
図15
下の図はフォーカスの枠線 (フォーカスの四角形) を描画しない場合
リスト7
copy code
unit Unit1;interface uses Windows, Messages, SysUtils, Variants, Classes, Graphics, Controls, Forms,
Dialogs, ExtCtrls, Grids;
type TplStringGrid = class (TStringGrid)
protected procedure DrawCell(ACol, ARow: Longint; ARect: TRect;AState: TGridDrawState); override ;
end ;TForm1 = class (TForm)
StringGrid1: TStringGrid;
Panel1: TPanel;
procedure FormCreate(Sender: TObject);private { Private 宣言 } plStringGrid1 : TplStringGrid;
public { Public 宣言 } end ;var Form1: TForm1;
implementation uses plChgCompo, GraphUtil;{$R *.dfm} // =============================================================================// テスト用に列数と列幅等を設定し、テスト用のデータを各セルにセット// // ChangeComponentの使用にはusesにplChgCompoが必要(添付)// =============================================================================procedure TForm1.FormCreate(Sender: TObject);begin // フォーム作成時にコンポーネントの入れ替えplStringGrid1 := TplStringGrid(ChangeComponent(StringGrid1, TplStringGrid));
plStringGrid1.DefaultDrawing := True;
plStringGrid1.DrawingStyle := gdsGradient;
plStringGrid1.Options := plStringGrid1.Options + [goDrawFocusSelected];
plStringGrid1.FixedCols := 1 ;
plStringGrid1.FixedRows := 1 ;
plStringGrid1.ColCount := 4 ;
plStringGrid1.RowCount := 4 ;
plStringGrid1.DefaultColWidth := 80 ;
// 左端の列幅設定plStringGrid1.ColWidths[0 ] := 10 ;
// テスト用の値をセット(固定行)plStringGrid1.Cells[1 ,0 ] := '調査番号' ;
plStringGrid1.Cells[2 ,0 ] := '都道府県' ;
plStringGrid1.Cells[3 ,0 ] := '結果値' ;
// テスト用の値をセットplStringGrid1.Cells[1 ,1 ] := 'A-100' ;
plStringGrid1.Cells[1 ,2 ] := 'A-200' ;
plStringGrid1.Cells[1 ,3 ] := 'A-300' ;
plStringGrid1.Cells[2 ,1 ] := '東京都' ;
plStringGrid1.Cells[2 ,2 ] := '大阪府' ;
plStringGrid1.Cells[2 ,3 ] := '京都府' ;
plStringGrid1.Cells[3 ,1 ] := '500' ;
plStringGrid1.Cells[3 ,2 ] := '800' ;
plStringGrid1.Cells[3 ,3 ] := '300' ;
end ;{ TplStringGrid } // =============================================================================// TStgingGridの継承元のDrawCellメソッド// テキストの描画が必要になると自動的に呼び出されて実行する// // グラデーション関係の関数の使用には、usesにGraphUtilが必要// =============================================================================procedure TplStringGrid.DrawCell(ACol, ARow: Integer; ARect: TRect;AState: TGridDrawState);
var uFmt : Cardinal;
begin // gdFixed(固定行または固定列)の場合if (gdFixed In AState) then begin // アライメンを指定uFmt := DT_CENTER or DT_SINGLELINE or DT_VCENTER;
// gdFixed(固定行または固定列)以外の場合end else begin // 選択状態(gdSelected)のセルの描画if gdSelected in AState then begin // Rectの矩形領域内をグラデーションで塗り潰すGradientFillCanvas(Canvas,
GetShadowColor(clWhite, 0 ),
GetShadowColor(clGray, 45 ),
ARect,
gdVertical);
end ;// 右寄せであるが、両端に10ドットの隙間をつけるOffsetRect(ARect, -10 , 0 );
// アライメントを指定uFmt := DT_RIGHT or DT_SINGLELINE or DT_VCENTER;
end ;Canvas.Font.Color := clBlack;
Canvas.Brush.Style := bsClear;
Windows.DrawText(Canvas.Handle, PChar(Cells[ACol, ARow]), -1 , ARect, uFmt);
end ;end .
デフォルトの文字列描画でいいのであれば、例えば、次のようなコードになります。
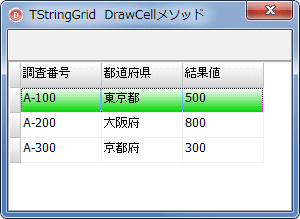
図16
この図は Options に goRowSelect がある場合
copy code
procedure TplStringGrid.DrawCell(ACol, ARow: Integer; ARect: TRect;AState: TGridDrawState);
var uFmt : Cardinal;
begin if gdSelected in AState then begin // Rectの矩形領域内をグラデーションで塗り潰すGradientFillCanvas(Canvas,
GetShadowColor(clWhite, 0 ),
GetShadowColor(clGreen, 40 ),
ARect,
gdVertical);
Canvas.Font.Color := clBlack;
end ;// 上記以外はデフォルトの描画inherited ;end ;
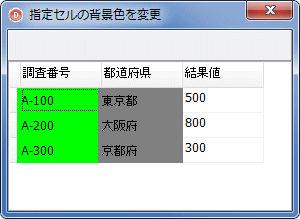
07_ セルのカスタム描画 - 指定セルの背景色を変更
指定したセルの背景色を変更するサンプルです。このサンプルでは指定列のセルの背景色だけを変更しています。
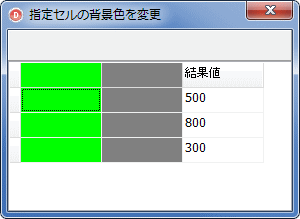
下図ではグリッド線の領域も塗り潰してします。左端と下端の 1 ピクセルはグリッド線の部分です。
グリッド線を表示する場合は、それらの値を調整します。
図17
下図は、塗り潰しの領域の調整をしない場合の結果です。この図は、固定セルであるかの判定もなしで、セルのテキスト (文字列) の描画コードも省略した場合となっいます。
図18
固定行の判定もしていない
セルのテキスト (文字) の描画コードなし
セル間はグリッド線の部分
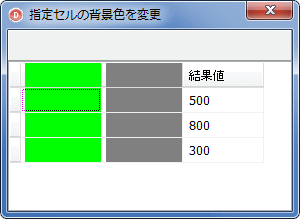
下図は Delphi XE5 の場合です。DrawCell メソッドの TRect 型の引数の値は Delphi のバージョンによって違いがあります。Delphi XE に比べて左端に 3 ピクセルのマージンがあります。グリッド線の太さが 1 ピクセルの時は、セル間は 4 ピクセルということになります。
図19
Delphi XE に比べて、左端に 3 ピクセルのマージンがある
リスト8
copy code
unit Unit1;interface uses Windows, Messages, SysUtils, Variants, Classes, Graphics, Controls, Forms,
Dialogs, ExtCtrls, Grids;
type TForm1 = class (TForm)
StringGrid1: TStringGrid;
Panel1: TPanel;
procedure FormCreate(Sender: TObject);procedure StringGrid1DrawCell(Sender: TObject; ACol, ARow: Integer;Rect: TRect; State: TGridDrawState);
private { Private 宣言 } public { Public 宣言 } end ;var Form1: TForm1;
implementation {$R *.dfm} // =============================================================================// テスト用に列数と列幅等を設定し、テスト用のデータを各セルにセット// =============================================================================procedure TForm1.FormCreate(Sender: TObject);begin StringGrid1.FixedCols := 1 ;
StringGrid1.FixedRows := 1 ;
StringGrid1.ColCount := 4 ;
StringGrid1.RowCount := 4 ;
StringGrid1.DefaultColWidth := 80 ;
// 左端の列幅設定StringGrid1.ColWidths[0 ] := 10 ;
// テスト用の値をセット(固定行)StringGrid1.Cells[1 ,0 ] := '調査番号' ;
StringGrid1.Cells[2 ,0 ] := '都道府県' ;
StringGrid1.Cells[3 ,0 ] := '結果値' ;
// テスト用の値をセットStringGrid1.Cells[1 ,1 ] := 'A-100' ;
StringGrid1.Cells[1 ,2 ] := 'A-200' ;
StringGrid1.Cells[1 ,3 ] := 'A-300' ;
StringGrid1.Cells[2 ,1 ] := '東京都' ;
StringGrid1.Cells[2 ,2 ] := '大阪府' ;
StringGrid1.Cells[2 ,3 ] := '京都府' ;
StringGrid1.Cells[3 ,1 ] := '500' ;
StringGrid1.Cells[3 ,2 ] := '800' ;
StringGrid1.Cells[3 ,3 ] := '300' ;
end ;// =============================================================================// StringGrid1 の OnDrawCell イベント処理// =============================================================================procedure TForm1.StringGrid1DrawCell(Sender: TObject; ACol, ARow: Integer;Rect: TRect; State: TGridDrawState);
var LRect : TRect;
LFormat : Cardinal;
begin // TStringGrid.DefaultDrawing が True でテーマが有効な場合// セルの描画領域は左端に 4 ピクセルのマージンがある// TCanvas.FillRect は下端と右端の 1 ピクセルは描画範囲に含まれない// それらを調整した描画領域用の TRect を作成するSetRect(LRect, Rect.Left - 4 , Rect.Top, Rect.Right + 1 , Rect.Bottom + 1 );
// テキスト(文字列)の描画用の書式を指定LFormat := DT_LEFT or DT_SINGLELINE or DT_VCENTER;
// 固定行は処理の対象がら除外if not (gdFixed in State) then begin if ACol = 1 then begin StringGrid1.Canvas.Brush.Color := clLime;
StringGrid1.Canvas.FillRect(LRect);
// セルのテキスト(文字列)を描画Windows.DrawText(StringGrid1.Canvas.Handle,
PChar(StringGrid1.Cells[ACol, ARow]),
-1 ,
Rect,
LFormat);
end ;if ACol = 2 then begin StringGrid1.Canvas.Brush.Color := clGray;
StringGrid1.Canvas.FillRect(LRect);
// セルのテキスト(文字列)を描画Windows.DrawText(StringGrid1.Canvas.Handle,
PChar(StringGrid1.Cells[ACol, ARow]),
-1 ,
Rect,
LFormat);
end ;end ;end ;end .
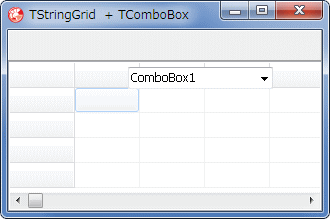
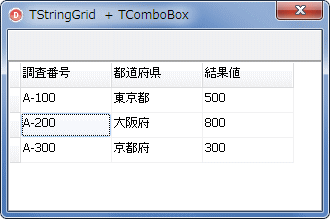
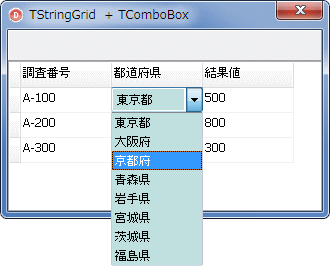
OnDrawCell イベント内で、他のコントロールを表示するサンプルです。
[備考]
図20
図21
図22
copy code
unit Unit1;interface uses Windows, Messages, SysUtils, Variants, Classes, Graphics, Controls, Forms,
Dialogs, ExtCtrls, Grids, StdCtrls;
type TForm1 = class (TForm)
StringGrid1: TStringGrid;
Panel1: TPanel;
ComboBox1: TComboBox;
procedure FormCreate(Sender: TObject);procedure StringGrid1DrawCell(Sender: TObject; ACol, ARow: Integer;Rect: TRect; State: TGridDrawState);
procedure StringGrid1SelectCell(Sender: TObject; ACol, ARow: Integer;var CanSelect: Boolean);procedure ComboBox1DrawItem(Control: TWinControl; Index: Integer;Rect: TRect; State: TOwnerDrawState);
procedure ComboBox1Change(Sender: TObject);private { Private 宣言 } public { Public 宣言 } end ;var Form1: TForm1;
implementation {$R *.dfm} // =============================================================================// すぐにテストできるように、列数と列幅等を設定し、テスト用のデータを各セルに// セットしておく// コンボボックスの設定も実行// =============================================================================procedure TForm1.FormCreate(Sender: TObject);begin StringGrid1.DefaultDrawing := True;
StringGrid1.DrawingStyle := gdsThemed;
StringGrid1.Options := StringGrid1.Options + [goDrawFocusSelected];
StringGrid1.ColCount := 4;
StringGrid1.FixedCols := 1;
StringGrid1.DefaultColWidth := 90;
// ここまではオブジェクトインスペクタで設定してもよい// 左端の列幅設定StringGrid1.ColWidths[0] := 10;
// テスト用の値をセットStringGrid1.Cells[1,0] := '調査番号' ;
StringGrid1.Cells[2,0] := '都道府県' ;
StringGrid1.Cells[3,0] := '結果値' ;
// テスト用の値をセットStringGrid1.RowCount := 4;
StringGrid1.Cells[1,1] := 'A-100' ;
StringGrid1.Cells[1,2] := 'A-200' ;
StringGrid1.Cells[1,3] := 'A-300' ;
StringGrid1.Cells[2,1] := '東京都' ;
StringGrid1.Cells[2,2] := '大阪府' ;
StringGrid1.Cells[2,3] := '京都府' ;
StringGrid1.Cells[3,1] := '500' ;
StringGrid1.Cells[3,2] := '800' ;
StringGrid1.Cells[3,3] := '300' ;
// コンポボッスの値をセットComboBox1.Items.Clear;
ComboBox1.Items.Add('東京都' );
ComboBox1.Items.Add('大阪府' );
ComboBox1.Items.Add('京都府' );
ComboBox1.Items.Add('青森県' );
ComboBox1.Items.Add('岩手県' );
ComboBox1.Items.Add('宮城県' );
ComboBox1.Items.Add('茨城県' );
ComboBox1.Items.Add('福島県' );
ComboBox1.Text := '' ;
// コンボボックスは非表示とするComboBox1.Visible := False;
// コンボボックスの高さをTStringGridの行高さに合わせるためにcsOwnerFixedに// -5という値は、実行して適当に修正するComboBox1.Style := csOwnerDrawFixed;
ComboBox1.ItemHeight := StringGrid1.DefaultRowHeight - 5;
// 見やすいように背景色を変更ComboBox1.Color := $00E0E0C0;
end ;// =============================================================================// TStringGridのOnDrawCellイベント// // このイベント内でコンボボックスを指定列に表示する// コンボボックスを表示しても、フォーカス移動の処理は行っていない// コンボボックスの表示以外はデフォルトの描画// =============================================================================procedure TForm1.StringGrid1DrawCell(Sender: TObject; ACol, ARow: Integer;Rect: TRect; State: TGridDrawState);
var AStr : String ;
begin AStr := StringGrid1.Cells[ACol, ARow];
// 入力フォーカスがあるセルの場合のみ処理if gdFocused in State then begin // コンボボックスを表示する列の番号は2if ACol = 2 then begin SetWindowPos(ComboBox1.Handle,
0,
Rect.Left + StringGrid1.Left + 1,
Rect.Top + StringGrid1.Top + 1,
Rect.Right - Rect.Left + 2,
Rect.Bottom - Rect.Top + 2,
SWP_NOZORDER or SWP_SHOWWINDOW);
ComboBox1.ItemIndex := ComboBox1.Items.IndexOf(AStr);
ComboBox1.Show;
end else begin if ComboBox1.Visible then ComboBox1.Visible := False;end ;end ;end ;// =============================================================================// TStringGridのOnSelectCellイベント// // コンボボックスで入力する列は編集不可にする// 実際にはコンボボックスが表示されているため編集はできないので不要// つまり、参考コード// =============================================================================procedure TForm1.StringGrid1SelectCell(Sender: TObject; ACol, ARow: Integer;var CanSelect: Boolean);begin if Acol = 2 then begin StringGrid1.Options := StringGrid1.Options - [goEditing]
end else begin StringGrid1.Options := StringGrid1.Options + [goEditing];
end ;end ;// =============================================================================// TComboBoxのOnDrawItemイベント// // コンボボックスの高さをTStringGridの行の高さに合わせているため、行の高さが// 高いと、コンボボックスのテキストが上端寄せで体裁がよくない// そのため、このイベントで再描画するようにした。本質的には不要// // TStringGridのOnDrawCellイベント同様に、このイベント内にコードがなくてもデ// フォルトの描画は実行される// =============================================================================procedure TForm1.ComboBox1DrawItem(Control: TWinControl; Index: Integer;Rect: TRect; State: TOwnerDrawState);
var AStr : String ;
uFmt : Cardinal;
begin // 文字列の描画位置をデフォルトから変更するので、それまでの描画を塗り潰すComboBox1.Canvas.FillRect(Rect);
// コンボボックスの各リストの値AStr := ComboBox1.Items[Index];
// 選択項目とそうでない項目ではフォントの色を変更if odSelected in State then begin ComboBox1.Canvas.Font.Color := clHighlightText;
end else begin ComboBox1.Canvas.Font.Color := clWindowText;
end ;// アライメンを指定して文字列を描画uFmt := DT_LEFT or DT_SINGLELINE or DT_VCENTER;
Rect.Left := Rect.Left + 3;
Windows.DrawText(ComboBox1.Canvas.Handle, PChar(AStr), -1, Rect, uFmt);
end ;// =============================================================================// TComboBoxのOnChangeイベント// コンボボックスでItemが変更となったらTStringGridのセルに値をセット// =============================================================================procedure TForm1.ComboBox1Change(Sender: TObject);begin StringGrid1.Cells[StringGrid1.Col, StringGrid1.Row] := ComboBox1.Text;
end ;end .
09_ データの保存と読み込み - CSV と TEXT プロパティ
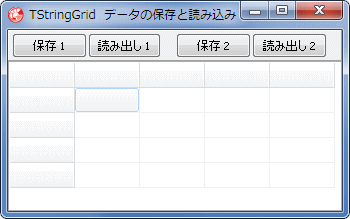
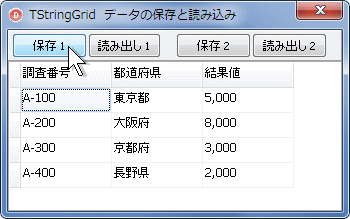
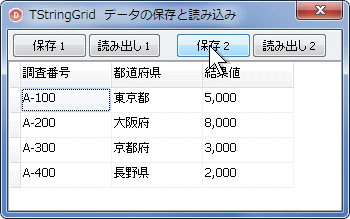
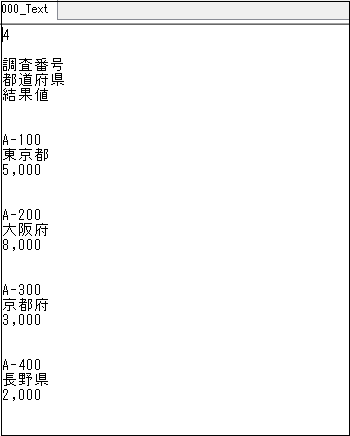
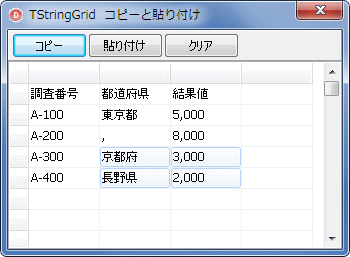
TStringGrid のセルのデータを保存し、その保存したデータを読み込むテストです。
タブ形式での保存と読み出しは、[20_クリップボードへのコピーと貼り付け]を参考にしてください。
[備考]
図23
図24
図25
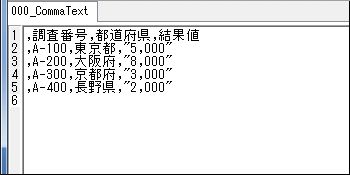
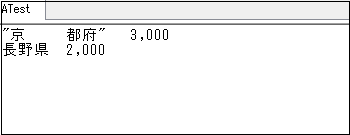
本サンプルでは、行単位で保存したので、グリッドの 1 行が 1 行となる
文字列にカンマが含まれる場合は、""で括られる
文字列に半角の空白文字がある場合も ""で括られる
図26
図27
copy code
unit Unit1;interface uses Windows, Messages, SysUtils, Variants, Classes, Graphics, Controls, Forms,
Dialogs, ExtCtrls, Grids, StdCtrls;
type TForm1 = class (TForm)
StringGrid1: TStringGrid;
Panel1: TPanel;
Button1: TButton;
Button2: TButton;
Button3: TButton;
Button4: TButton;
procedure FormCreate(Sender: TObject);procedure Button1Click(Sender: TObject);procedure Button2Click(Sender: TObject);procedure Button3Click(Sender: TObject);procedure Button4Click(Sender: TObject);private { Private 宣言 } public { Public 宣言 } end ;var Form1: TForm1;
implementation {$R *.dfm} // =============================================================================// すぐにテストできるように、列数と列幅等を設定し、テスト用のデータをセット// =============================================================================procedure TForm1.FormCreate(Sender: TObject);begin StringGrid1.DefaultDrawing := True;
StringGrid1.DrawingStyle := gdsThemed;
StringGrid1.Options := StringGrid1.Options + [goEditing];
StringGrid1.Options := StringGrid1.Options + [goDrawFocusSelected];
StringGrid1.FixedCols := 1 ;
StringGrid1.FixedRows := 1 ;
StringGrid1.DefaultColWidth := 90 ;
// 左端の列幅設定StringGrid1.ColWidths[0 ] := 10 ;
StringGrid1.ColCount := 4 ;
StringGrid1.RowCount := 5 ;
// テスト用の値をセット(タイトル行)StringGrid1.Cells[1 ,0 ] := '調査番号' ;
StringGrid1.Cells[2 ,0 ] := '都道府県' ;
StringGrid1.Cells[3 ,0 ] := '結果値' ;
// テスト用の値をセットStringGrid1.Cells[1 ,1 ] := 'A-100' ;
StringGrid1.Cells[1 ,2 ] := 'A-200' ;
StringGrid1.Cells[1 ,3 ] := 'A-300' ;
StringGrid1.Cells[1 ,4 ] := 'A-400' ;
StringGrid1.Cells[2 ,1 ] := '東京都' ;
StringGrid1.Cells[2 ,2 ] := '大阪府' ;
StringGrid1.Cells[2 ,3 ] := '京都府' ;
StringGrid1.Cells[2 ,4 ] := '長野県' ;
StringGrid1.Cells[3 ,1 ] := '5,000' ;
StringGrid1.Cells[3 ,2 ] := '8,000' ;
StringGrid1.Cells[3 ,3 ] := '3,000' ;
StringGrid1.Cells[3 ,4 ] := '2,000' ;
end ;// =============================================================================// グリッドのデータの保存 1// CommaTextで保存// グリッドに読み込む際に、列または行単位で読み込める// =============================================================================procedure TForm1.Button1Click(Sender: TObject);var AFilePath : String ;
SL : TStringList;
iRow : Integer;
begin AFilePath := ExtractFilePath(ParamStr(0 )) + '000_CommaText.txt' ;
SL := TStringList.Create;
try for iRow := 0 to StringGrid1.RowCount - 1 do begin SL.Add(StringGrid1.Rows[iRow].CommaText);
end ;// 保存SL.SaveToFile(AFilePath);
finally FreeAndNil(SL);
end ;end ;// =============================================================================// グリッドにコンマテキストのデータを読み込む// 列または行単位で読み込める// =============================================================================procedure TForm1.Button2Click(Sender: TObject);var AFilePath : String ;
SL : TStringList;
i : Integer;
LColSL : TStringList;
begin AFilePath := ExtractFilePath(ParamStr(0 )) + '000_CommaText.txt' ;
if not FileExists(AFilePath) then begin Application.MessageBox('ファイルがありません。' , '情報' , MB_OK);
exit;
end ;for i := 0 to StringGrid1.RowCount - 1 do begin StringGrid1.Rows[i].Clear;
end ;StringGrid1.ColCount := StringGrid1.FixedCols + 1 ;
StringGrid1.RowCount := StringGrid1.FixedRows + 1 ;
StringGrid1.Refresh;
Sleep(2000 );
// 描画更新の一時停止StringGrid1.Rows[0 ].BeginUpdate;
try SL := TStringList.Create;
try // ファイルを読み込むSL.LoadFromFile(AFilePath);
// 列数(カンマの数+1)を取得LColSL := TStringList.Create;
try LColSL.DelimitedText := SL[0 ];
StringGrid1.ColCount := LColSL.Count;
finally FreeAndNil(LColSL);
end ;// 行数StringGrid1.RowCount := SL.Count;
for i := 0 to SL.Count -1 do begin StringGrid1.Rows[i].Delimiter := ',' ;
StringGrid1.Rows[i].StrictDelimiter := True;
StringGrid1.Rows[i].DelimitedText := SL[i];
end ;finally FreeAndNil(SL);
end ;finally // 描画更新を再開StringGrid1.Rows[0 ].EndUpdate;
end ;end ;// =============================================================================// グリッドのデータの保存 2// Textプロパティで保存// グリッドに読み込む際に、セル単位で読み込むので、細かい制御が可能// =============================================================================procedure TForm1.Button3Click(Sender: TObject);var AFilePath : String ;
SL : TStringList;
iRow : Integer;
begin AFilePath := ExtractFilePath(ParamStr(0 )) + '000_Text.txt' ;
SL := TStringList.Create;
try for iRow := 0 to StringGrid1.RowCount -1 do begin SL.Add(StringGrid1.Rows[iRow].Text);
end ;// 行数または列数を先頭に記録しておく// ここでは行単位で記録したので、列数を記録// 行数は、読み出した後で計算可能SL.Insert(0 , IntToStr(StringGrid1.ColCount));
SL.SaveToFile(AFilePath);
finally FreeAndNil(SL);
end ;end ;// =============================================================================// グリッドにTextプロパティで保存したデータを読み込む// 行または列単位のデータごとに改行が入っているので注意// このサンプルプログラムでは、行単位のデータごとに改行が入っている// =============================================================================procedure TForm1.Button4Click(Sender: TObject);var AFilePath : String ;
SL : TStringList;
AColCnt : Integer;
ARowCnt : Integer;
iRow : Integer;
iCol : Integer;
SLRow : Integer;
begin AFilePath := ExtractFilePath(ParamStr(0 )) + '000_Text.txt' ;
if not FileExists(AFilePath) then begin Application.MessageBox('ファイルがありません。' , '情報' , MB_OK);
exit;
end ;for iRow := 0 to StringGrid1.RowCount - 1 do begin StringGrid1.Rows[iRow].Clear;
end ;StringGrid1.ColCount := StringGrid1.FixedCols + 1 ;
StringGrid1.RowCount := StringGrid1.FixedRows + 1 ;
StringGrid1.Refresh;
Sleep(2000 );
// 描画更新の一時停止StringGrid1.Rows[0 ].BeginUpdate;
try SL := TStringList.Create;
try // ファイルを読み出して、先頭に保存してある列数の値を取り出すSL.LoadFromFile(AFilePath);
AColCnt := StrToInt(SL[0 ]);
SL.Delete(0 );
// グリッドの列と行を設定StringGrid1.ColCount := AColCnt;
ARowCnt := (SL.Count - AColCnt) div AColCnt;
StringGrid1.RowCount := ARowCnt;
// データの読み出しfor iRow := 0 to ARowCnt - 1 do begin for iCol := 0 to AColCnt - 1 do begin SLRow := AColCnt * iRow + iCol;
StringGrid1.Cells[iCol, iRow] := SL[SLRow];
end ;// Textプロパティで保存したデータには、行または列ごとに改行が入るので削除if iRow < ARowCnt then SL.Delete(SLRow);end ;finally FreeAndNil(SL);
end ;finally // 描画更新を再開StringGrid1.Rows[0 ].EndUpdate;
end ;end ;end .
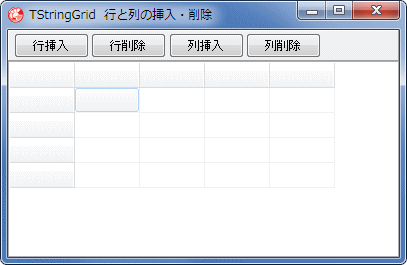
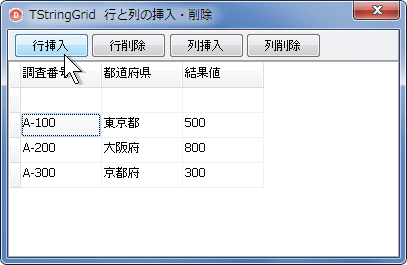
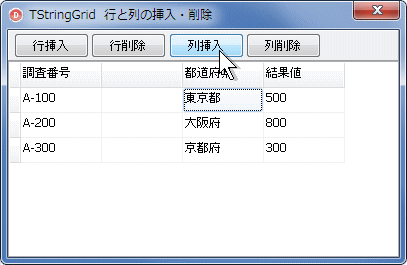
グリッドの行または列の挿入と削除のサンプルです。
このように、protected 部のメソッド、プロパティ等にアクセスするには、implementation 部に継承クラスを定義する方法が簡単ですが、interface 部で定義した方が使い勝手がよく、コーディングも楽になります。ただし、この場合、継承するクラス名には注意が必要です。他のユニットに同名のクラス名かあると、問題が発生することがあります。
行や列を削除するのではなく、非表示にする場合は、以下のように、該当する行の高さ、あるいは列の幅のプロパティに -1 を代入すると非表示にできます。
StringGrid1.RowHeights[2 ] := -1 ; // 固定行も含めて上から3行目を非表示にするStringGrid1.ColWidths[2 ] := -1 ; // 固定列も含めて左から3列目を非表示にする
図28
図29
図30
copy code
unit Unit1;interface uses Windows, Messages, SysUtils, Variants, Classes, Graphics, Controls, Forms,
Dialogs, ExtCtrls, Grids, StdCtrls;
type TForm1 = class (TForm)
StringGrid1: TStringGrid;
Panel1: TPanel;
Button1: TButton;
Button2: TButton;
Button3: TButton;
Button4: TButton;
procedure FormCreate(Sender: TObject);procedure Button1Click(Sender: TObject);procedure Button2Click(Sender: TObject);procedure Button3Click(Sender: TObject);procedure Button4Click(Sender: TObject);private { Private 宣言 } public { Public 宣言 } end ;var Form1: TForm1;
implementation {$R *.dfm} // protected部にアクセスするためのクラス宣言type TMyGrid = class (TStringGrid);
// =============================================================================// すぐにテストできるように、列数と列幅等を設定し、テスト用のデータをセット// =============================================================================procedure TForm1.FormCreate(Sender: TObject);begin StringGrid1.DefaultDrawing := True;
StringGrid1.DrawingStyle := gdsThemed;
StringGrid1.Options := StringGrid1.Options + [goDrawFocusSelected];
StringGrid1.FixedCols := 1;
StringGrid1.FixedRows := 1;
StringGrid1.DefaultColWidth := 80;
// 左端の列幅設定StringGrid1.ColWidths[0] := 10;
StringGrid1.ColCount := 3 + StringGrid1.FixedCols;
StringGrid1.RowCount := 3 + StringGrid1.FixedRows;
// テスト用の値をセット(固定行)StringGrid1.Cells[1,0] := '調査番号' ;
StringGrid1.Cells[2,0] := '都道府県' ;
StringGrid1.Cells[3,0] := '結果値' ;
// テスト用の値をセットStringGrid1.Cells[1,1] := 'A-100' ;
StringGrid1.Cells[1,2] := 'A-200' ;
StringGrid1.Cells[1,3] := 'A-300' ;
StringGrid1.Cells[2,1] := '東京都' ;
StringGrid1.Cells[2,2] := '大阪府' ;
StringGrid1.Cells[2,3] := '京都府' ;
StringGrid1.Cells[3,1] := '500' ;
StringGrid1.Cells[3,2] := '800' ;
StringGrid1.Cells[3,3] := '300' ;
end ;// =============================================================================// 行の挿入// 現在選択中の行の上に挿入// 実際には、最後の行の下に追加して現在の行に移動する// =============================================================================procedure TForm1.Button1Click(Sender: TObject);var ARowCnt : Integer;
ARow : Integer;
begin // 現在の行位置ARow := StringGrid1.Row;
// 行挿入ARowCnt := StringGrid1.RowCount + 1;
StringGrid1.RowCount := ARowCnt;
TMyGrid(StringGrid1).MoveRow(ARowCnt, ARow);
// 先頭行の前に挿入の場合// データ行が1行しかない場合、行の削除の後にデータが残っていることがある// そのための処理if ARowCnt = (StringGrid1.FixedRows + 2) then begin if ARow = (StringGrid1.FixedRows) then begin StringGrid1.Rows[StringGrid1.FixedRows].Clear;
end ;end ;// TButtonから操作しているので、StringGridにフォーカスを戻す// TSpeedButton等から操作すれば不要StringGrid1.SetFocus;
end ;// =============================================================================// 行の削除// 現在選択中の行を削除// =============================================================================procedure TForm1.Button2Click(Sender: TObject);var ARow : Integer;
begin // 現在の行位置ARow := StringGrid1.Row;
// FixesRows(固定行)のみだけにはできないので、データ行は必ず1行分残すif StringGrid1.RowCount = (StringGrid1.FixedRows + 1) then begin StringGrid1.Rows[ARow].Clear;
end else begin // 最後の行の場合// ヘルプに最後の行を削除にはRowCountプロパティを設定と書いてあるので従ったif ARow = (StringGrid1.RowCount - 1) then begin StringGrid1.RowCount := StringGrid1.RowCount - 1;
end else begin // 行の削除実行TMyGrid(StringGrid1).DeleteRow(ARow);
// フォーカス行が固定行のすぐ下の場合は、その行にフォーカスを戻しておくif ARow = StringGrid1.FixedRows then begin StringGrid1.Row := StringGrid1.FixedRows;
end ;end ;end ;// TButtonから操作しているので、StringGridにフォーカスを戻す// TSpeedButton等から操作すれば不要StringGrid1.SetFocus;
end ;// =============================================================================// 列の挿入// 現在選択中の列の左側に挿入// 実際には、最後の列の下に追加して現在の列に移動する// =============================================================================procedure TForm1.Button3Click(Sender: TObject);var AColCnt : Integer;
ACol : Integer;
begin // 現在の列位置ACol := StringGrid1.Col;
// 列挿入AColCnt := StringGrid1.ColCount + 1;
StringGrid1.ColCount := AColCnt;
StringGrid1.ColWidths[AColCnt - 1] := StringGrid1.DefaultColWidth;
TMyGrid(StringGrid1).MoveColumn(AColCnt - 1, ACol);
// 先頭列の前に挿入の場合// データ列が1列しかない場合、列の削除の後にデータが残っていることがある// そのための処理if AColCnt = (StringGrid1.FixedCols + 2) then begin if ACol = (StringGrid1.FixedCols) then begin StringGrid1.Cols[StringGrid1.FixedCols].Clear;
end ;end ;// TButtonから操作しているので、StringGridにフォーカスを戻す// TSpeedButton等から操作すれば不要StringGrid1.SetFocus;
end ;// =============================================================================// 列の削除// 現在選択中の列を削除// =============================================================================procedure TForm1.Button4Click(Sender: TObject);var ACol : Integer;
begin // 現在の行位置ACol := StringGrid1.Col;
// FixesCols(固定列)のみだけにはできないので、データ列は必ず1列分残すif StringGrid1.ColCount = (StringGrid1.FixedCols + 1) then begin StringGrid1.Cols[ACol].Clear;
end else begin // 最後の列の場合// ヘルプに最後の列を削除にはColCountプロパティを設定と書いてあるので従ったif ACol = (StringGrid1.ColCount - 1) then begin StringGrid1.ColCount := StringGrid1.ColCount - 1;
end else begin // 列の削除実行TMyGrid(StringGrid1).DeleteColumn(ACol);
// フォーカス列が固定列のすぐ右の場合は、その列にフォーカスを戻しておくif ACol = StringGrid1.FixedCols then begin StringGrid1.Col := StringGrid1.FixedCols;
end ;end ;end ;// TButtonから操作しているので、StringGridにフォーカスを戻す// TSpeedButton等から操作すれば不要StringGrid1.SetFocus;
end ;end .
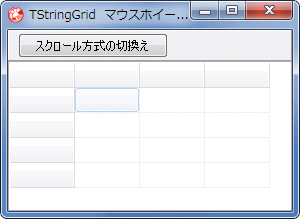
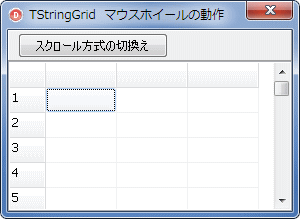
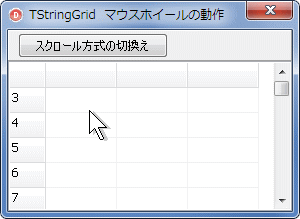
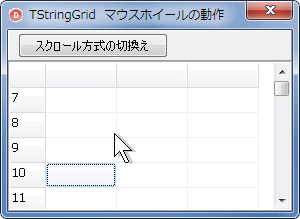
スクロールバーでグリッドをスクロールすると、選択状態のセル位置の絶対値はそのままです。つまり、スクロール範囲を超えると選択状態は見えなくなります。
マウスホイールによる操作ではありませんが、Options プロパティに goThumbTracking というメンバがあります。これを含めると、スクロールバーの「つまみ (スクロールボックス)」の移動と同時にグリッドの表示もスクロールします。
TScrollBox の場合は、この goThumbTracking に相当するプロパティは、次のように、縦と横のスクロールバー別に設定するようになっています。
TScrollBox.HorzScrollBar.Tracking
TScrollBox.VertScrollBar.Tracking
HorzScrollBar, VertScrollBar の型は、共に TControlScrollBar です。
図31
図32
図33
スクロールして 2 行 2 列目が見えなくなると、選択セルも見えなくなる
これはスクロールバーでの操作と同じ動作
図34
リスト12
copy code
unit Unit1;interface uses Windows, Messages, SysUtils, Variants, Classes, Graphics, Controls, Forms,
Dialogs, ExtCtrls, Grids, StdCtrls;
type TForm1 = class (TForm)
StringGrid1: TStringGrid;
Panel1: TPanel;
Button1: TButton;
procedure FormCreate(Sender: TObject);procedure Button1Click(Sender: TObject);private { Private 宣言 } OriginProc : TWndMethod;
ScrollStyleFlag : Boolean;
procedure GridSubClassProc(var message: TMessage);public { Public 宣言 } end ;var Form1: TForm1;
implementation {$R *.dfm} // =============================================================================// すぐにテストできるように、列数と列幅等を設定し、テスト用のデータをセット// TStringGridのWindowProcを独自のものに変更// =============================================================================procedure TForm1.FormCreate(Sender: TObject);var i : Integer;
begin // StringGrid1の元のWindowProcを退避し、新しくサブクラス関数を設定OriginProc := StringGrid1.WindowProc;
StringGrid1.WindowProc := GridSubClassProc;
// テスト用にフラグを設定しておくScrollStyleFlag := True;
StringGrid1.DefaultDrawing := True;
StringGrid1.DrawingStyle := gdsThemed;
StringGrid1.Options := StringGrid1.Options + [goDrawFocusSelected];
StringGrid1.Options := StringGrid1.Options + [goThumbTracking];
StringGrid1.ColCount := 4;
StringGrid1.RowCount := 2001;
StringGrid1.FixedCols := 1;
StringGrid1.FixedRows := 1;
StringGrid1.DefaultColWidth := 70;
// 左端の列幅設定StringGrid1.ColWidths[0] := 35;
// スクロールした状態を把握するために、左端の列に番号を表示しておくfor i := 1 to StringGrid1.RowCount - 1 do begin StringGrid1.Cells[0, i] := IntToStr(i);
end ;end ;// =============================================================================// StringGrid1用のサブクラス関数// =============================================================================procedure TForm1.GridSubClassProc(var message: TMessage);begin // フラグがFalseの時は元のWindowsProcを実行// このフラグはButton1クリックで切り替えるif ScrollStyleFlag = False then begin OriginProc(message);
exit;
end ;// マウスホイールからメッセージが来た時の処理// 実は、これは通常のマウスホイールの処理if message.Msg = WM_MOUSEWHEEL then begin if TWMMouseWheel(message).WheelDelta > 0 then begin SendMessage(StringGrid1.Handle, WM_VSCROLL, SB_LINEUP, 0);
end else begin SendMessage(StringGrid1.Handle, WM_VSCROLL, SB_LINEDOWN, 0);
end ;message.Result := 0;
// マウスホイールからのメッセージ以外の場合// StringGrid1の元々のWindowProcを実行end else begin OriginProc(message);
end ;end ;// =============================================================================// テスト用のフラグのセット// トグル操作となっている// =============================================================================procedure TForm1.Button1Click(Sender: TObject);begin ScrollStyleFlag := not ScrollStyleFlag;
end ;end .
上と同じ動作仕様は、TStringGrid の継承クラスやサブクラスを使用しなくても、TStringGrid のイベントを使用するだけでも可能です。その例です。
リスト13
copy code
// =============================================================================// すぐにテストできるように、列数と列幅等を設定し、テスト用のデータをセット// =============================================================================procedure TForm1.FormCreate(Sender: TObject);var i : Integer;
begin StringGrid1.DefaultDrawing := True;
StringGrid1.DrawingStyle := gdsThemed;
StringGrid1.Options := StringGrid1.Options + [goDrawFocusSelected];
StringGrid1.Options := StringGrid1.Options + [goThumbTracking];
StringGrid1.ColCount := 4 ;
StringGrid1.RowCount := 2001 ;
StringGrid1.FixedCols := 1 ;
StringGrid1.FixedRows := 1 ;
StringGrid1.DefaultColWidth := 70 ;
// 左端の列幅設定StringGrid1.ColWidths[0 ] := 35 ;
// スクロールした状態を把握するために、左端の列に番号を表示しておくfor i := 1 to StringGrid1.RowCount - 1 do begin StringGrid1.Cells[0 , i] := IntToStr(i);
end ;end ;// =============================================================================// TStringGridのOnMouseWheelDownイベント処理// =============================================================================procedure TForm1.StringGrid1MouseWheelDown(Sender: TObject; Shift: TShiftState;MousePos: TPoint; var Handled: Boolean);
begin StringGrid1.Perform(WM_VSCROLL, SB_LINEDOWN, 0 );
Handled := True;
end ;// =============================================================================// TStringGridのOnMouseWheelUpベント処理// =============================================================================procedure TForm1.StringGrid1MouseWheelUp(Sender: TObject; Shift: TShiftState;MousePos: TPoint; var Handled: Boolean);
begin StringGrid1.Perform(WM_VSCROLL, SB_LINEUP, 0 );
Handled := True;
end ;
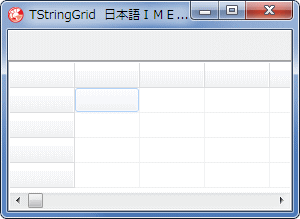
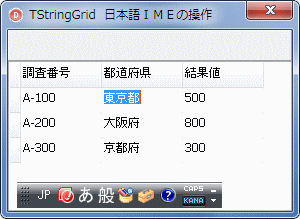
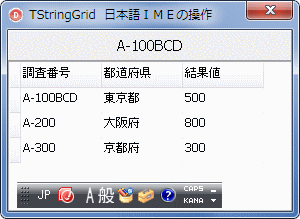
セルが編集状態になった時に、日本語IMEを制御する 1 つの方法です。
この方法で設定した IME の設定は、セルの編集が終了してもそのままです。他のコントロールへフォーカス移動した場合や、他のセルの編集時に再度 IME の設定が必要です。
図35
図36
図37
copy code
unit Unit1;interface uses Windows, Messages, SysUtils, Variants, Classes, Graphics, Controls, Forms,
Dialogs, ExtCtrls, Grids, StdCtrls;
type TForm1 = class (TForm)
StringGrid1: TStringGrid;
Panel1: TPanel;
procedure FormCreate(Sender: TObject);procedure StringGrid1GetEditText(Sender: TObject; ACol, ARow: Integer;var Value: string );procedure StringGrid1SetEditText(Sender: TObject; ACol, ARow: Integer;const Value: string );private { Private 宣言 } public { Public 宣言 } end ;var Form1: TForm1;
implementation {$R *.dfm} // protected部にアクセスするためのクラス宣言type TMyGrid = class (TStringGrid);
// =============================================================================// すぐにテストできるように、列数と列幅等を設定し、テスト用のデータセット// =============================================================================procedure TForm1.FormCreate(Sender: TObject);begin StringGrid1.DefaultDrawing := True;
StringGrid1.DrawingStyle := gdsThemed;
StringGrid1.Options := StringGrid1.Options + [goEditing];
StringGrid1.Options := StringGrid1.Options + [goDrawFocusSelected];
StringGrid1.FixedCols := 1;
StringGrid1.FixedRows := 1;
StringGrid1.ColCount := 4;
StringGrid1.RowCount := 4;
StringGrid1.DefaultColWidth := 80;
// 左端の列幅設定StringGrid1.ColWidths[0] := 10;
// テスト用の値をセット(固定行)StringGrid1.Cells[1,0] := '調査番号' ;
StringGrid1.Cells[2,0] := '都道府県' ;
StringGrid1.Cells[3,0] := '結果値' ;
// テスト用の値をセットStringGrid1.Cells[1,1] := 'A-100' ;
StringGrid1.Cells[1,2] := 'A-200' ;
StringGrid1.Cells[1,3] := 'A-300' ;
StringGrid1.Cells[2,1] := '東京都' ;
StringGrid1.Cells[2,2] := '大阪府' ;
StringGrid1.Cells[2,3] := '京都府' ;
StringGrid1.Cells[3,1] := '500' ;
StringGrid1.Cells[3,2] := '800' ;
StringGrid1.Cells[3,3] := '300' ;
end ;// =============================================================================// セルが編集状態になった時に発生するイベント// インプレースエディタが有効になる// このインプレースエディタのハンドルに対して日本語IMEを設定// =============================================================================procedure TForm1.StringGrid1GetEditText(Sender: TObject; ACol, ARow: Integer;var Value: string );var InpEdit : HWND;
begin InpEdit := TMyGrid(StringGrid1).InplaceEditor.Handle;
// 列番号が2の時にのみ日本語入力を許可し、それ以外はOFFにするif (ACol = 2) and (InpEdit > 0) then begin SetImeMode(InpEdit, imHira);
end else begin SetImeMode(InpEdit, imClose);
end ;Panel1.Caption := '' ;
end ;// =============================================================================// セルの値を編集すると発生するイベント// 編集中の文字列を逐次表示// =============================================================================procedure TForm1.StringGrid1SetEditText(Sender: TObject; ACol, ARow: Integer;const Value: string );begin Panel1.Caption := Value;
end ;end .
13_ セル編集時の背景色とフォント - サブクラス使用
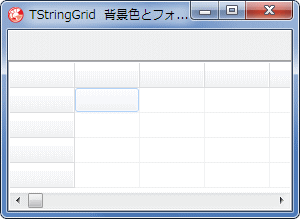
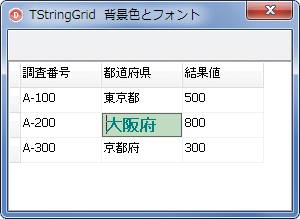
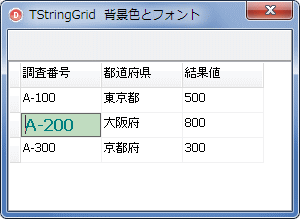
セルが編集状態になった時に、セルの背景色と入力中の文字フォントを変更します。このサンプルコードでは、TStringGrid のサブクラスを作成し、その中で InplaceEditor プロパティ (TInplaceEditor) を操作しています。
図38
図39
背景色とフォントをデフォルト値から変更
入力キャレットは文字列の先頭に移動
リスト15
copy code
unit Unit1;interface uses Windows, Messages, SysUtils, Variants, Classes, Graphics, Controls, Forms,
Dialogs, ExtCtrls, Grids, StdCtrls;
type TForm1 = class (TForm)
StringGrid1: TStringGrid;
Panel1: TPanel;
procedure FormCreate(Sender: TObject);procedure StringGrid1GetEditText(Sender: TObject; ACol, ARow: Integer;var Value: string );private { Private 宣言 } InpEdit : TInplaceEdit;
EditStartFlag : Boolean;
OriginProc : TWndMethod;
procedure GridSubClassProc(var message: TMessage);public { Public 宣言 } end ;var Form1: TForm1;
implementation {$R *.dfm} // protected部にアクセスするためのクラス宣言type TMyGrid = class (TStringGrid);
TMyInpEdit = class (TInplaceEdit);
// =============================================================================// すぐにテストできるように、列数と列幅等を設定し、テスト用のデータセット// TStringGridの派生コンポーネントで上記を実現するには、CanEditShowをオーバーライド(下記)// =============================================================================procedure TForm1.FormCreate(Sender: TObject);begin // StringGrid1の元のWindowProcを退避し、新しくサブクラス関数を設定OriginProc := StringGrid1.WindowProc;
StringGrid1.WindowProc := GridSubClassProc;
// セルが編集モードに入ったかのフラグEditStartFlag := False;
StringGrid1.DefaultDrawing := True;
StringGrid1.Options := StringGrid1.Options + [goEditing];
StringGrid1.Options := StringGrid1.Options + [goDrawFocusSelected];
StringGrid1.FixedCols := 1;
StringGrid1.FixedRows := 1;
StringGrid1.ColCount := 4;
StringGrid1.RowCount := 4;
StringGrid1.DefaultColWidth := 80;
// 左端の列幅設定StringGrid1.ColWidths[0] := 10;
// テスト用の値をセット(固定行)StringGrid1.Cells[1,0] := '調査番号' ;
StringGrid1.Cells[2,0] := '都道府県' ;
StringGrid1.Cells[3,0] := '結果値' ;
// テスト用の値をセットStringGrid1.Cells[1,1] := 'A-100' ;
StringGrid1.Cells[1,2] := 'A-200' ;
StringGrid1.Cells[1,3] := 'A-300' ;
StringGrid1.Cells[2,1] := '東京都' ;
StringGrid1.Cells[2,2] := '大阪府' ;
StringGrid1.Cells[2,3] := '京都府' ;
StringGrid1.Cells[3,1] := '500' ;
StringGrid1.Cells[3,2] := '800' ;
StringGrid1.Cells[3,3] := '300' ;
end ;// =============================================================================// セルが編集状態になった時に発生するイベント// インプレースエディタが有効になる// 編集開始の意味でEditStartFlagをTrueにする// =============================================================================procedure TForm1.StringGrid1GetEditText(Sender: TObject; ACol, ARow: Integer;var Value: string );begin InpEdit := TMyGrid(StringGrid1).InplaceEditor;
if (InpEdit <> nil ) then begin // セルの背景色と枠線InpEdit.Brush.Color := clMoneyGreen;
TMyInpEdit(InpEdit).BorderStyle := bsSingle;
TMyInpEdit(inpEdit).SelStart := 0;
EditStartFlag := True;
end ;end ;// =============================================================================// StringGrid1用のサブクラス関数// // インプレースエディタの編集開始の取得は、EditorModeプロパティでは早すぎる// [VK_F2]で編集モードに入った場合は、キャレットの位置の変更はしない// [Enter]とマウスクリックで編集モードになった場合のみ有効// =============================================================================procedure TForm1.GridSubClassProc(var message: TMessage);begin // フラグがFalseの時は元のWindowsProcを実行OriginProc(message);
// 設定を実行したかの判定にEditStrarFlagを使用するif EditStartFlag then begin if (InpEdit <> nil ) and (InpEdit.Visible) then begin // キャレットは文字列の先頭にTMyInpEdit(inpEdit).SelStart := 0;
// フォントの設定TMyInpEdit(InpEdit).Font.Color := clTeal;
TMyInpEdit(InpEdit).Font.Size := 12;
TMyInpEdit(InpEdit).Font.Style := TMyInpEdit(inpEdit).Font.Style + [fsBold];
// 設定完了EditStartFlag := False;
end ;end ;end ;end .
14_ セル編集時の背景色とフォント - 継承クラス使用
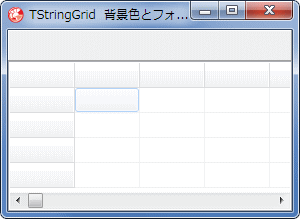
前のサンプルプログラムでは、TStringGrid のサブクラスを作成しましたが、TStringGrid には、インプレースエディタが起動すると自動的に呼び出される CanEditShow という関数があります。この関数を使用する例です。
この他、選択セルに TEdit や TMemo を表示し、編集用に利用してしまう方法もあります。
図40
図41
背景色とフォントをデフォルト値から変更
入力キャレットは文字列の先頭に移動
リスト16
copy code
unit Unit1;interface uses Windows, Messages, SysUtils, Variants, Classes, Graphics, Controls, Forms,
Dialogs, ExtCtrls, Grids, StdCtrls;
type TplStringGrid = class (TStringGrid)
protected function CanEditShow: Boolean; override ;end ;TForm1 = class (TForm)
StringGrid1: TStringGrid;
Panel1: TPanel;
procedure FormCreate(Sender: TObject);private { Private 宣言 } plStringGrid1 : TplStringGrid;
public { Public 宣言 } end ;var Form1: TForm1;
implementation uses plChgCompo;{$R *.dfm} // protected部にアクセスするためのクラス宣言type TMyInpEdit = class (TInplaceEdit);
// =============================================================================// すぐにテストできるように、列数と列幅等を設定し、テスト用のデータセット// =============================================================================procedure TForm1.FormCreate(Sender: TObject);begin // フォーム作成時にコンポーネントの入れ替えplStringGrid1 := TplStringGrid(ChangeComponent(StringGrid1, TplStringGrid));
plStringGrid1.DefaultDrawing := True;
plStringGrid1.Options := StringGrid1.Options + [goEditing];
plStringGrid1.Options := StringGrid1.Options + [goDrawFocusSelected];
plStringGrid1.FixedCols := 1;
plStringGrid1.FixedRows := 1;
plStringGrid1.ColCount := 4;
plStringGrid1.RowCount := 4;
plStringGrid1.DefaultColWidth := 80;
// 左端の列幅設定plStringGrid1.ColWidths[0] := 10;
// テスト用の値をセット(固定行)plStringGrid1.Cells[1,0] := '調査番号' ;
plStringGrid1.Cells[2,0] := '都道府県' ;
plStringGrid1.Cells[3,0] := '結果値' ;
// テスト用の値をセットplStringGrid1.Cells[1,1] := 'A-100' ;
plStringGrid1.Cells[1,2] := 'A-200' ;
plStringGrid1.Cells[1,3] := 'A-300' ;
plStringGrid1.Cells[2,1] := '東京都' ;
plStringGrid1.Cells[2,2] := '大阪府' ;
plStringGrid1.Cells[2,3] := '京都府' ;
plStringGrid1.Cells[3,1] := '500' ;
plStringGrid1.Cells[3,2] := '800' ;
plStringGrid1.Cells[3,3] := '300' ;
end ;{ TplStringGrid } // =============================================================================// TStringGridのprotected部のCanEditShow関数のoverride// CanEditShow関数は、セルが編集モードになった時に、自動的に呼ばれる関数// ここで各種の設定を行う// // [VK_F2]で編集モードに入った場合は、キャレットの位置の変更はしない// [Enter]とマウスクリックで編集モードになった場合のみ有効// =============================================================================function TplStringGrid.CanEditShow: Boolean;begin Result := inherited CanEditShow;
if InplaceEditor <> nil then begin // セルの背景色InplaceEditor.Brush.Color := clMoneyGreen;
// フォントの設定TMyInpEdit(InplaceEditor).Font.Color := clTeal;
TMyInpEdit(InplaceEditor).Font.Size := 12;
TMyInpEdit(InplaceEditor).Font.Style :=
TMyInpEdit(InplaceEditor).Font.Style + [fsBold];
// セルの枠線TMyInpEdit(InplaceEditor).BorderStyle := bsSingle;
// キャレットの位置InplaceEditor.SelStart := 0;
end ;end ;end .
15_ 複数のセルを選択 - Objects プロパティ使用
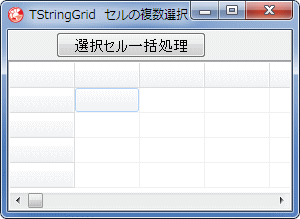
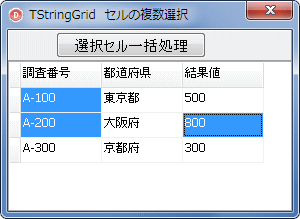
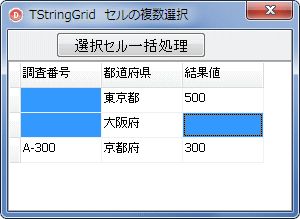
複数のセルを選択可能にするサンプルコードです。
実際には、[Ctrl] キーなど、特別なキーを押下している時だけ、複数選択を可能にした方がいいかも知れません。OnMouseDown イベント内で、キーの押下状態を取得するには、例えば GetKeyboardState 関数を使用します。
図42
図43
選択セルをマウスクリックすると選択解除
アクティブなセルは常に 1 つだけ
図44
copy code
unit Unit1;interface uses Windows, Messages, SysUtils, Variants, Classes, Graphics, Controls, Forms,
Dialogs, ExtCtrls, Grids, StdCtrls, Buttons;
type TForm1 = class (TForm)
StringGrid1: TStringGrid;
Panel1: TPanel;
SpeedButton1: TSpeedButton;
procedure FormCreate(Sender: TObject);procedure StringGrid1MouseDown(Sender: TObject; Button: TMouseButton;Shift: TShiftState; X, Y: Integer);
procedure StringGrid1DrawCell(Sender: TObject; ACol, ARow: Integer;Rect: TRect; State: TGridDrawState);
procedure SpeedButton1Click(Sender: TObject);private { Private 宣言 } public { Public 宣言 } end ;var Form1: TForm1;
implementation {$R *.dfm} // =============================================================================// すぐにテストできるように、列数と列幅等を設定し、テスト用のデータセット// =============================================================================procedure TForm1.FormCreate(Sender: TObject);begin StringGrid1.DefaultDrawing := True;
StringGrid1.Options := StringGrid1.Options - [goEditing];
StringGrid1.Options := StringGrid1.Options - [goDrawFocusSelected];
StringGrid1.Options := StringGrid1.Options - [goRangeSelect];
StringGrid1.FixedCols := 1 ;
StringGrid1.FixedRows := 1 ;
StringGrid1.ColCount := 4 ;
StringGrid1.RowCount := 4 ;
StringGrid1.DefaultColWidth := 80 ;
// 左端の列幅設定StringGrid1.ColWidths[0 ] := 10 ;
// テスト用の値をセット(固定行)StringGrid1.Cells[1 ,0 ] := '調査番号' ;
StringGrid1.Cells[2 ,0 ] := '都道府県' ;
StringGrid1.Cells[3 ,0 ] := '結果値' ;
// テスト用の値をセットStringGrid1.Cells[1 ,1 ] := 'A-100' ;
StringGrid1.Cells[1 ,2 ] := 'A-200' ;
StringGrid1.Cells[1 ,3 ] := 'A-300' ;
StringGrid1.Cells[2 ,1 ] := '東京都' ;
StringGrid1.Cells[2 ,2 ] := '大阪府' ;
StringGrid1.Cells[2 ,3 ] := '京都府' ;
StringGrid1.Cells[3 ,1 ] := '500' ;
StringGrid1.Cells[3 ,2 ] := '800' ;
StringGrid1.Cells[3 ,3 ] := '300' ;
end ;// =============================================================================// OnMouseDownイベント// クリックする度にTObjectの値を整数の1かnilに切り替えるトグル操作// // TOjbectプロパティの使用方法は以下を参照// Halbow資料館の[Objects[]って何だろう]// ../../Halbow/Notes/N023.html// =============================================================================procedure TForm1.StringGrid1MouseDown(Sender: TObject; Button: TMouseButton;Shift: TShiftState; X, Y: Integer);
var iCol : Integer;
iRow : Integer;
begin if Button = mbLeft then begin iCol := StringGrid1.Col;
iRow := StringGrid1.Row;
if StringGrid1.Objects[iCol, iRow] = nil then begin StringGrid1.Objects[iCol, iRow] := TObject(1 );
end else begin StringGrid1.Objects[iCol, iRow] := nil ;
end ;end ;end ;// =============================================================================// OnDrawCellイベント// TObjectの値が1ならば背景を塗り潰す// =============================================================================procedure TForm1.StringGrid1DrawCell(Sender: TObject; ACol, ARow: Integer;Rect: TRect; State: TGridDrawState);
begin if Integer(StringGrid1.Objects[ACol, ARow]) = 1 then begin StringGrid1.Canvas.Brush.Color := clHighlight;
StringGrid1.Canvas.Font.Color := clHighlightText;
StringGrid1.Canvas.FillRect(Rect);
StringGrid1.Canvas.TextRect(Rect, Rect.Left+2 , Rect.Top+2 ,
StringGrid1.Cells[ACol, ARow]);
end ;end ;// =============================================================================// 選択セルの一括処理例// // [美号]// マウスドラッグ等で選択した連続した選択セルの範囲は、Selectionで取得できる// 選択は、[Shift]キーを押したままであれば、左上と右下だけで範囲選択が可能// // Selectionプロパティは、TGridRect構造体に値をセットして、コードでも連続し// たセルの選択ができる(OptionのgoRangeSelectがTrueの場合)// この時、goRowSelectがTrueだと行単位の選択が可能// このサンプルプログラムでは、このSelectionプロパティの機能との共存は面倒// =============================================================================procedure TForm1.SpeedButton1Click(Sender: TObject);var iCol : Integer;
iRow : Integer;
begin // 描画更新の一時停止StringGrid1.Cols[0 ].BeginUpdate;
try for iRow := 0 to StringGrid1.RowCount - 1 do begin for iCol := 0 to StringGrid1.ColCount -1 do begin // if StringGrid1.Objects[iCol, iRow] = TObject(1) then begin でも同じif Integer(StringGrid1.Objects[iCol, iRow]) = 1 then begin StringGrid1.Cells[iCol, iRow] := '' ;
end ;end ;end ;finally // 描画更新を再開StringGrid1.Cols[0 ].EndUpdate;
end ;end ;end .
次のサンプルは、Embarcadero のサイトの Delphi Tips の [複数行入力できる StringGrid を作成する] の記事に掲載してある MlsGrid.pas を使用してみました。この記事中のソースコードをMlsGrid.pas という名前でパスの通ったフォルダに保存しておきます。
単なる複数行表示であれば、改行文字を含んだ文字列を、DrawText 関数あるいは DrawTextEx 関数を使用して描画できます。この時、テキスト描画オプションに DT_VCENTER と DT_SINGLELINE を含まないようにします。
また、入力のセルに TMemo を表示して入力してしまう方法も考えられます。この TMemo を実行時に生成するのではなく、TMemo の継承クラスを実行時に生成するか、コンポボックスの表示のサンプルのように、設計時に非表示でフォームに配置しておきます。そうすれば比較的簡単に TMemo のイベントやプロパティが設定できます。TMemo は、Parent プロパティを設定しないと正しく表示されません。
図45
図46
図47
このコンポは、[Enter] キーは改行入力なので [Enter] では入力終了とならない
リスト18
copy code
unit Unit1;interface uses Windows, Messages, SysUtils, Variants, Classes, Graphics, Controls, Forms,
Dialogs, ExtCtrls, Grids, StdCtrls, MlsGrid, plChgCompo;
type TForm1 = class (TForm)
StringGrid1: TStringGrid;
procedure FormCreate(Sender: TObject);private { Private 宣言 } public { Public 宣言 } end ;var Form1: TForm1;
implementation {$R *.dfm} // =============================================================================// 列数と列幅等を設定// =============================================================================procedure TForm1.FormCreate(Sender: TObject);begin // フォーム作成時にコンポーネントの機能を入れ替えStringGrid1 := TStringGrid(ChangeComponent(StringGrid1, TMLStringGrid));
// 折り返し表示をTrueにTMLStringGrid(StringGrid1).WordWrap := True;
StringGrid1.DefaultDrawing := True;
StringGrid1.Options := StringGrid1.Options + [goEditing];
StringGrid1.FixedCols := 1;
StringGrid1.FixedRows := 1;
StringGrid1.ColCount := 4;
StringGrid1.RowCount := 4;
StringGrid1.DefaultColWidth := 120;
StringGrid1.DefaultRowHeight := 60;
// 固定行と固定行の設定StringGrid1.ColWidths[0] := 24;
StringGrid1.RowHeights[0] := 24;
end ;end .
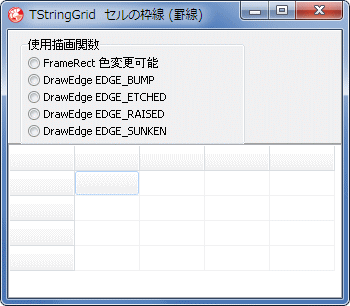
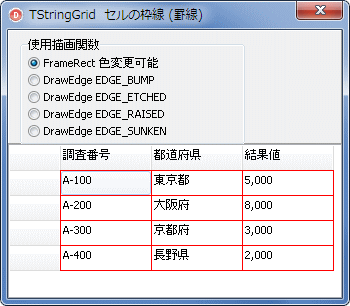
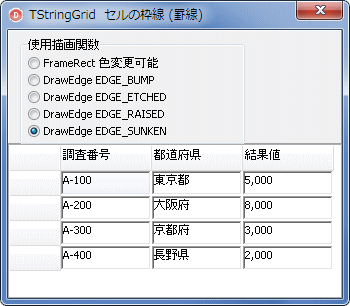
セルの枠線またはグリッド線の色等をデフォルトから変更したい場合の参考サンプルコードです。FraemRect 関数と、エッヂ効果を表現できる DrawEdge 関数もテストできるようにしてみました。
[備考 1]
[備考 2]
[備考 3]
図48
図49
図50
copy code
unit Unit1;interface uses Windows, Messages, SysUtils, Variants, Classes, Graphics, Controls, Forms,
Dialogs, ExtCtrls, Grids, StdCtrls;
type TForm1 = class (TForm)
Panel1: TPanel;
RadioGroup1: TRadioGroup;
StringGrid1: TStringGrid;
procedure FormCreate(Sender: TObject);procedure StringGrid1DrawCell(Sender: TObject; ACol, ARow: Integer;Rect: TRect; State: TGridDrawState);
procedure RadioGroup1Click(Sender: TObject);private { Private 宣言 } public { Public 宣言 } end ;var Form1: TForm1;
implementation uses GraphUtil;{$R *.dfm} // =============================================================================// テスト用に列数と列幅等を設定し、テスト用のデータを各セルにセット// =============================================================================procedure TForm1.FormCreate(Sender: TObject);begin // セルの枠線はOnDrawCellイベント内で描画するので、デフォルトの線は描画しない// このプロパティ以外はDelphi 2010のTStringGridのデフォルトのままStringGrid1.Options := StringGrid1.Options - [goVertLine];
StringGrid1.Options := StringGrid1.Options - [goHorzLine];
StringGrid1.Options := StringGrid1.Options - [goDrawFocusSelected];
StringGrid1.FixedCols := 1;
StringGrid1.FixedRows := 1;
StringGrid1.DefaultColWidth := 90;
// 左端の列幅設定StringGrid1.ColWidths[0] := 50;
StringGrid1.ColCount := 4;
StringGrid1.RowCount := 5;
// テスト用の値をセット(タイトル行)StringGrid1.Cells[1,0] := '調査番号' ;
StringGrid1.Cells[2,0] := '都道府県' ;
StringGrid1.Cells[3,0] := '結果値' ;
// テスト用の値をセットStringGrid1.Cells[1,1] := 'A-100' ;
StringGrid1.Cells[1,2] := 'A-200' ;
StringGrid1.Cells[1,3] := 'A-300' ;
StringGrid1.Cells[1,4] := 'A-400' ;
StringGrid1.Cells[2,1] := '東京都' ;
StringGrid1.Cells[2,2] := '大阪府' ;
StringGrid1.Cells[2,3] := '京都府' ;
StringGrid1.Cells[2,4] := '長野県' ;
StringGrid1.Cells[3,1] := '5,000' ;
StringGrid1.Cells[3,2] := '8,000' ;
StringGrid1.Cells[3,3] := '3,000' ;
StringGrid1.Cells[3,4] := '2,000' ;
RadioGroup1.ItemIndex := 0;
end ;// =============================================================================// OnDrawCellイベント// 固定行と固定列を除くセルの枠線の描画を変更// =============================================================================procedure TForm1.StringGrid1DrawCell(Sender: TObject; ACol, ARow: Integer;Rect: TRect; State: TGridDrawState);
var OriginRect : TRect;
grfFlags : Cardinal;
edge : Cardinal;
begin OriginRect := Rect;
// 固定行または固定列は除くif not (gdFixed In State) then begin if RadioGroup1.ItemIndex = 0 then begin InflateRect(OriginRect, 1, 1);
StringGrid1.Canvas.Brush.Color := clRed;
StringGrid1.Canvas.FrameRect(OriginRect);
end else begin if RadioGroup1.ItemIndex = 1 then edge := EDGE_BUMP;if RadioGroup1.ItemIndex = 2 then edge := EDGE_ETCHED;if RadioGroup1.ItemIndex = 3 then edge := EDGE_RAISED;if RadioGroup1.ItemIndex = 4 then edge := EDGE_SUNKEN;grfFlags := BF_RECT;
DrawEdge(StringGrid1.Canvas.Handle, OriginRect, edge, grfFlags);
end ;end ;end ;// =============================================================================// ラジオボタンをクリックしたら再描画// =============================================================================procedure TForm1.RadioGroup1Click(Sender: TObject);begin StringGrid1.Invalidate;
end ;end .
テーマが有効となっている場合、TStringGrid のセルのグリッド線は淡く薄い色です。上のサンプルのようにグリッド線を強調するものいいかも知れません。
copy code
// -----------------------------------------------------------------------------// Delphi XE(UP1) ProのGrids.pas内のTCustomGrid.Paintメソッドの一部// LineColorがグリッド線の枠線の色// -----------------------------------------------------------------------------begin if UseRightToLeftAlignment then ChangeGridOrientation(True);if (FInternalDrawingStyle = gdsThemed) then begin if Win32MajorVersion >= 6 then begin LineColor := $F0F0F0 ; // LineColorがグリッドの枠線の色GetThemeColor(ThemeServices.Theme[teHeader], HP_HEADERITEM, HIS_NORMAL,
TMT_EDGEFILLCOLOR, LColorRef);
LFixedBorderColor := LColorRef;
end
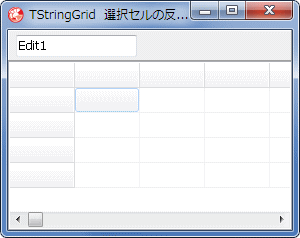
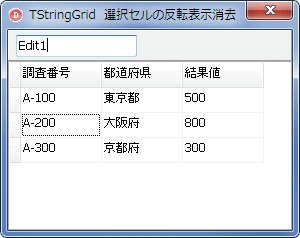
Options プロパティの goDrawFocusSelected を False にすると、選択セルの反転表示をしませんが、フォーカスが他のコントロールに移動すると、反転表示してしまいます。これを阻止します。
図51
図52
リスト20
copy code
unit Unit1;interface uses Windows, Messages, SysUtils, Variants, Classes, Graphics, Controls, Forms,
Dialogs, ExtCtrls, Grids, StdCtrls;
type TplStringGrid = class (TStringGrid)
private protected function SelectCell(ACol, ARow: Longint): Boolean; override ;procedure WMKillFocus(var Message: TWMKillFocus); message WM_KILLFOCUS;end ;TForm1 = class (TForm)
StringGrid1: TStringGrid;
Panel1: TPanel;
Edit1: TEdit;
procedure FormCreate(Sender: TObject);private { Private 宣言 } plStringGrid1 : TplStringGrid;
public { Public 宣言 } end ;var Form1: TForm1;
implementation uses plChgCompo;{$R *.dfm} // =============================================================================// すぐにテストできるように、列数と列幅等を設定し、テスト用のデータセット// // ChangeComponentの使用にはusesにplChgCompoが必要(添付)// =============================================================================procedure TForm1.FormCreate(Sender: TObject);begin // フォーム作成時にコンポーネントの入れ替えplStringGrid1 := TplStringGrid(ChangeComponent(StringGrid1, TplStringGrid));
plStringGrid1.DefaultDrawing := True;
plStringGrid1.Options := StringGrid1.Options - [goEditing];
StringGrid1.Options := StringGrid1.Options - [goDrawFocusSelected];
plStringGrid1.Options := StringGrid1.Options + [goThumbTracking];
plStringGrid1.FixedCols := 1 ;
plStringGrid1.FixedRows := 1 ;
plStringGrid1.ColCount := 4 ;
plStringGrid1.RowCount := 4 ;
plStringGrid1.DefaultColWidth := 80 ;
// 左端の列幅設定plStringGrid1.ColWidths[0 ] := 10 ;
// テスト用の値をセット(固定行)plStringGrid1.Cells[1 ,0 ] := '調査番号' ;
plStringGrid1.Cells[2 ,0 ] := '都道府県' ;
plStringGrid1.Cells[3 ,0 ] := '結果値' ;
// テスト用の値をセットplStringGrid1.Cells[1 ,1 ] := 'A-100' ;
plStringGrid1.Cells[1 ,2 ] := 'A-200' ;
plStringGrid1.Cells[1 ,3 ] := 'A-300' ;
plStringGrid1.Cells[2 ,1 ] := '東京都' ;
plStringGrid1.Cells[2 ,2 ] := '大阪府' ;
plStringGrid1.Cells[2 ,3 ] := '京都府' ;
plStringGrid1.Cells[3 ,1 ] := '500' ;
plStringGrid1.Cells[3 ,2 ] := '800' ;
plStringGrid1.Cells[3 ,3 ] := '300' ;
// ActiveControlをStringGridにしてSelectCell関数を実行させるActiveControl := plStringGrid1;
end ;{ TplStringGrid } // =============================================================================// セルを選択した時に自動的に実行される関数// =============================================================================function TplStringGrid.SelectCell(ACol, ARow: Integer): Boolean;begin // Focusがある時は通常の動作// これがないとセル選択時の動作が不正となるif Focused then begin Result := inherited SelectCell(ACol, ARow);
end else begin Result := False;
end ;end ;// =============================================================================// フォーカスを失った時の発生するメッセージ// =============================================================================procedure TplStringGrid.WMKillFocus(var Message: TWMKillFocus);begin // 編集中の時は通常の動作。それ以外は何もしないif InplaceEditor <> nil then begin Inherited ;end ;end ;end .
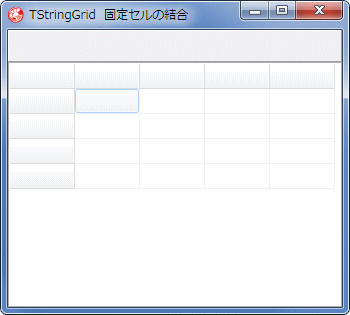
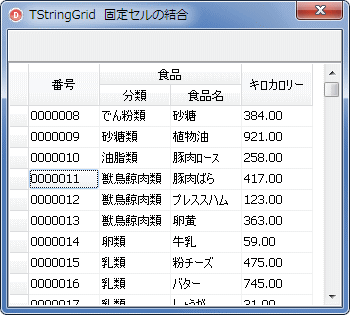
固定行のセルを結合して表示する例です。
データセルの結合もこれと同じようなコードでできますが、実用的にするには解決すべき問題がいくつかあります。選択セルの問題、スクロール時の選択状態の制御、また、データの入力時にはインプレースエディタを再生成する等して、入力欄のサイズの変更も必要となります。表示専用というのであれば利用できるかも知れません。
データセルの結合は、おそらく DefaultDraw を False にして、全て自前で描画するか、Paint メソッドを overrid e(オーバーライド) して実装する必要があるのではないかと思われます。
図53
図54
固定行のセルのいくつかを結合
添付の 10 万行のデータを読み込んで表示
copy code
unit Unit1;interface uses Windows, Messages, SysUtils, Variants, Classes, Graphics, Controls, Forms,
Dialogs, ExtCtrls, Grids, StdCtrls, Buttons;
type TplStringGrid = class (TStringGrid)
protected procedure DrawCell(ACol, ARow: Longint; ARect: TRect;AState: TGridDrawState); override ;
procedure DrawCellBackground(const ARect: TRect; AColor: TColor;AState: TGridDrawState; ACol, ARow: Integer); override ;
public function GetCombineRect(ACol, ARow : Integer): TRect;end ;TForm1 = class (TForm)
StringGrid1: TStringGrid;
Panel1: TPanel;
procedure FormCreate(Sender: TObject);private { Private 宣言 } plStringGrid1 : TplStringGrid;
public { Public 宣言 } end ;var Form1: TForm1;
implementation uses plChgCompo;{$R *.dfm} // =============================================================================// すぐにテストできるように、列数と列幅等を設定し、テスト用のデータセット// // ChangeComponentの使用にはusesにplChgCompoが必要(添付)// =============================================================================procedure TForm1.FormCreate(Sender: TObject);var AFileName : String ;
SL : TStringList;
i : Integer;
begin // フォーム作成時にコンポーネントの入れ替えplStringGrid1 := TplStringGrid(ChangeComponent(StringGrid1, TplStringGrid));
plStringGrid1.DefaultDrawing := True;
plStringGrid1.Options := StringGrid1.Options - [goEditing];
StringGrid1.Options := StringGrid1.Options + [goDrawFocusSelected];
plStringGrid1.Options := StringGrid1.Options + [goThumbTracking];
plStringGrid1.FixedCols := 1 ;
plStringGrid1.FixedRows := 2 ;
plStringGrid1.DefaultColWidth := 70 ;
plStringGrid1.DefaultRowHeight := 20 ;
// 左端の列幅設定plStringGrid1.ColWidths[0 ] := 18 ;
// 表示データをファイルから読み込むAFileName := ExtractFilePath(Application.ExeName) + 'ATest_100000.txt' ;
SL := TStringList.Create;
try SL.LoadFromFile(AFileName);
plStringGrid1.ColCount := 5 ;
plStringGrid1.RowCount := SL.Count;
plStringGrid1.Rows[0 ].CommaText := ',' + SL[0 ];
for i := 2 to SL.Count - 1 do begin plStringGrid1.Rows[i].CommaText := ',' + SL[i];
end ;finally FreeAndNil(SL);
end ;end ;{ TplStringGrid } // =============================================================================// 文字列(テキスト)と枠線の描画用関数// 文字列または枠線を描画する必要がある時に自動的に実行される// =============================================================================procedure TplStringGrid.DrawCell(ACol, ARow: Integer; ARect: TRect;AState: TGridDrawState);
var LRect : TRect;
uFmt : Cardinal;
StrText : String ;
begin LRect := ARect;
LRect := GetCombineRect(ACol, ARow);
// 固定セルの時はデフォルト描画を実行しない// アライメンを指定して文字列を描画if gdFixed in AState then begin uFmt := DT_CENTER or DT_SINGLELINE or DT_VCENTER;
// 列番号も行番号も大きい値で指定しないと、背景描画で塗り潰されてしまうif (ACol = 1 ) and (ARow = 1 ) then StrText := '番号' ;if (ACol = 3 ) and (ARow = 0 ) then StrText := '食品' ;if (ACol = 2 ) and (ARow = 1 ) then StrText := '分類' ;if (ACol = 3 ) and (ARow = 1 ) then StrText := '食品名' ;if (ACol = 4 ) and (ARow = 1 ) then StrText := 'キロカロリー' ;Windows.DrawText(Canvas.Handle, PChar(StrText), -1 , LRect, uFmt);
end else begin inherited DrawCell(ACol, ARow, LRect, AState);end ;end ;// =============================================================================// 背景の描画用関数// 背景を描画する必要がある時に自動的に実行される// =============================================================================procedure TplStringGrid.DrawCellBackground(const ARect: TRect;AColor: TColor; AState: TGridDrawState; ACol, ARow: Integer);
var LRect : TRect;
begin LRect := ARect;
LRect := GetCombineRect(ACol, ARow);
inherited DrawCellBackground(LRect, AColor, AState, ACol, ARow);end ;// =============================================================================// 列または行を結合した時のTRect構造体の値を返す関数// 背景描画とセル内容描画でも使用するので関数にした// =============================================================================function TplStringGrid.GetCombineRect(ACol, ARow : Integer): TRect;begin // 列の結合// 1行目の3から4列目を結合if ARow = 0 then begin if (ACol >= 2 ) and (ACol <= 3 ) then begin UnionRect(Result, CellRect(2 , ARow), CellRect(3 , ARow));
end ;end ;// 行の結合// 1列目と2列目と5列目は1から2行目を結合if (ACol = 0 ) or (ACol = 1 ) or (ACol = 4 ) then begin if (ARow >= 0 ) and (ARow <= 1 ) then begin UnionRect(Result, CellRect(ACol, 0 ), CellRect(ACol, 1 ));
// 以下でも結果は同じ// Result.Top := CellRect(ACol, 0).Top;// Result.Bottom := CellRect(ACol, 1).Bottom;end ;end ;end ;end .
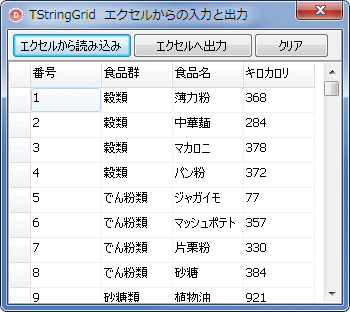
20_ エクセルからの読み込みとエクセルへの出力 - バリアント配列
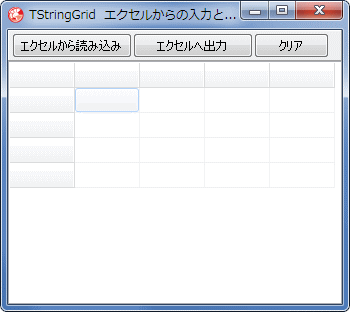
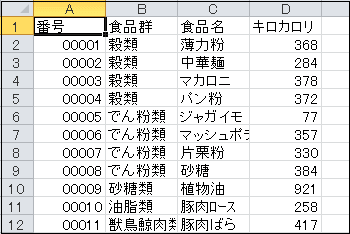
エクセルからデータを読み出してデータをセットし、またエクセルへデータを出力します。
エクセルを非表示で実行すれば、更に処理が速くなることが期待できます。
図55
図56
実行すると添付のテスト用ブックを表示
このデータを StringGrid に表示する
図57
番号の値は、元々書式を設定した数値なので先頭の 0 はなくなる
リスト22
copy code
unit Unit1;interface uses Windows, Messages, SysUtils, Variants, Classes, Graphics, Controls, Forms,
Dialogs, ExtCtrls, Grids, StdCtrls, ComObj, Excel2000;
type TForm1 = class (TForm)
StringGrid1: TStringGrid;
Panel1: TPanel;
Button1: TButton;
Button2: TButton;
procedure FormCreate(Sender: TObject);procedure Button1Click(Sender: TObject);procedure Button2Click(Sender: TObject);procedure FormShow(Sender: TObject);procedure FormClose(Sender: TObject; var Action: TCloseAction);private { Private 宣言 } ExcelObj : OleVariant;
WorkBook : OleVariant;
WorkSheet : OleVariant;
function xlfToA1(Row, Col: Integer): String ;function xlfToR1C1(A1: String ): TPoint;public { Public 宣言 } end ;var Form1: TForm1;
implementation {$R *.dfm} // =============================================================================// 列幅等を設定// =============================================================================procedure TForm1.FormCreate(Sender: TObject);begin StringGrid1.DefaultDrawing := True;
StringGrid1.DrawingStyle := gdsThemed;
StringGrid1.Options := StringGrid1.Options + [goEditing];
StringGrid1.Options := StringGrid1.Options + [goDrawFocusSelected];
StringGrid1.Options := StringGrid1.Options + [goColSizing];
StringGrid1.Options := StringGrid1.Options + [goRowSizing];
StringGrid1.Options := StringGrid1.Options + [goThumbTracking];
StringGrid1.FixedCols := 1;
StringGrid1.FixedRows := 1;
StringGrid1.DefaultColWidth := 70;
// 左端の列幅設定StringGrid1.ColWidths[0] := 20;
end ;// =============================================================================// フォームを表示したら、テスト用にエクセルを起動// =============================================================================procedure TForm1.FormShow(Sender: TObject);var BookName : String ;
begin ExcelObj := CreateOleObject('Excel.Application' );
ExcelObj := ExcelObj.Application;
// ブックを開くBookName := ExtractFilePath(Application.ExeName) + 'ATestBook.xls' ;
WorkBook := ExcelObj.Workbooks.Open(BookName);
// シートオブジェクトを定義WorkSheet := WorkBook.WorkSheets[1];
// 表示ExcelObj.Visible := True;
ExcelObj.ActiveWindow.WindowState := xlMaximized;
end ;// =============================================================================// フォームを閉じる時はエクセルも閉じる// =============================================================================procedure TForm1.FormClose(Sender: TObject; var Action: TCloseAction);begin try if GetActiveOleObject('Excel.Application' ) <> nil then begin // 変更なしにしてしまう(保存確認ダイアログを表示しない)WorkBook.Saved := True;
WorkBook.close;
WorkBook := unAssigned;
WorkSheet := unAssigned;
ExcelObj := unAssigned;
ExcelObj.Quit;
end ;except if not VarIsEmpty(ExcelObj) then begin ExcelObj.Quit;
end ;end ;end ;// =============================================================================// エクセルからデータを読み込む// 高速処理のためにバリアント配列を使用// // [参考]// Delphi から、新しいブックを作成するを自動化する方法// [マイクロソフト サポートオンライン]// http:// support.microsoft.com/kb/231614/ja// =============================================================================procedure TForm1.Button1Click(Sender: TObject);var ExcelColRow : TPoint;
StartCell : String ;
EndCell : String ;
StartCol : Integer;
StartRow : Integer;
OleArray : OleVariant;
iReadRowCnt : Integer;
iReadColCnt : Integer;
i : Integer;
j : Integer;
iRow : Integer;
iCol : Integer;
begin if VarIsEmpty(ExcelObj) then exit;// 読み出すエクセルの左上と右下のセルStartCell := 'A1' ;
EndCell := 'D1001' ;
// エクセルの左上のセルを行番号と列番号を取得ExcelColRow := xlfToR1C1(StartCell);
StartRow := ExcelColRow.Y;
StartCol := ExcelColRow.X;
// エクセルの右下のセルを行番号と列番号を取得して読み出す行数と列数を計算ExcelColRow := xlfToR1C1(EndCell);
iReadRowCnt := ExcelColRow.Y - StartRow + 1;
iReadColCnt := ExcelColRow.X - StartCol + 1;
try // バリアント配列を作成OleArray := VarArrayCreate([0, iReadRowCnt - 1, 0, iReadColCnt - 1], VarVariant);
// エクセルのデータをバリアント配列に格納OleArray := WorkSheet.Range[StartCell, EndCell].Value;
// StringGridの表示の更新を停止StringGrid1.Rows[0].BeginUpdate;
// StringGridの行数と列数を設定StringGrid1.RowCount := iReadRowCnt + StringGrid1.FixedRows - 1;
StringGrid1.ColCount := iReadColCnt + StringGrid1.FixedCols;
// バリアント配列の値をStringGridのセルに代入for i := 1 to iReadRowCnt do begin iRow := i + StringGrid1.FixedRows - 2;
for j := 1 to iReadColCnt do begin iCol := j + StringGrid1.FixedCols - 1;
StringGrid1.Cells[iCol, iRow] := OleArray[i, j];
end ;end ;// StringGridの表示更新StringGrid1.Rows[0].EndUpdate;
finally // バリアント配列を空にVarClear(OleArray);
end ;end ;// =============================================================================// StringGridに表示中のデータをエクセルに出力// =============================================================================procedure TForm1.Button2Click(Sender: TObject);var iSendRowCnt : Integer;
iSendColCnt : Integer;
ExcelColRow : TPoint;
StartCell : String ;
EndCell : String ;
StartCol : Integer;
StartRow : Integer;
OleArray : Variant;
SendList : TStringList;
TempList : TStringList;
i : Integer;
j : Integer;
begin if VarIsEmpty(ExcelObj) then exit;// 出力するStringGridの行数と列数// + 1はタイトル行分// 固定列も出力したい場合は、その列数を追加するiSendRowCnt := StringGrid1.RowCount - StringGrid1.FixedRows + 1;
iSendColCnt := StringGrid1.ColCount - StringGrid1.FixedCols;
// エクセル側の書き出しの最初のセルStartCell := 'A1' ;
// そのセルの行と列番号を取得ExcelColRow := xlfToR1C1(StartCell);
StartRow := ExcelColRow.Y;
StartCol := ExcelColRow.X;
// 取得した値からエクセル側の書き出し最終セルを計算EndCell := xlfToA1(StartRow + iSendRowCnt -1 , StartCol + iSendColCnt - 1);
SendList := TStringList.Create;
TempList := TStringList.Create;
try // バリアント配列を作成OleArray := VarArrayCreate([0, iSendRowCnt - 1, 0, iSendColCnt - 1], VarVariant);
// エクセルの対象セル範囲のデータをクリアWorksheet.Range[StartCell, EndCell].Clear;
Sleep(500);
// StringGridは行または列単位で処理した方が速いのでTStringListに格納して処理for i := 0 to iSendRowCnt - 1 do begin SendList.Add(StringGrid1.Rows[i + StringGrid1.FixedRows - 1].CommaText);
end ;// バリアント配列に格納していくfor i := 0 to iSendRowCnt - 1 do begin // Textプロパティでは改行が追加されるのでうまくいかないTempList.CommaText := SendList[i];
for j := 0 to iSendColCnt - 1 do begin OleArray[i, j] := TempList[j + StringGrid1.FixedCols];
end ;end ;// エクセルにバリアント配列データを送るWorksheet.Range[StartCell, EndCell].Value := OleArray;
// エクセルの列幅どどう調整WorkSheet.Columns.AutoFit;
finally // バリアント配列を空にVarClear(OleArray);
FreeAndNil(SendList);
FreeAndNil(TempList);
end ;end ;// =============================================================================// A1形式のセルの番地をR1C1形式に変換する(絶対座標)// // TPoint.x 列番号// TPoint.y 行番号// 行列番号は1から(0からではないので注意)// =============================================================================function TForm1.xlfToR1C1(A1: String ): TPoint;var RC : OleVariant;
begin Result.x := 1;
Result.y := 1;
try RC := ExcelObj.Application.ConvertFormula(A1, xlA1, xlR1C1, xlAbsolute);
Result.x := StrToInt(System.Copy(RC, Pos('C' ,RC) + 1, Length(RC)));
Result.y := StrToInt(System.Copy(RC, 2, Pos('C' ,RC) - 2));
except end ;end ;// =============================================================================// R1C1形式のセルの番地をA1形式に変換する関数(絶対座標)// // 行列番号は1から(0からではないので注意)// =============================================================================function TForm1.xlfToA1(Row, Col: Integer): String ;var A : OleVariant;
RC : OleVariant;
begin Result := Unassigned;
A := 'R' + IntToStr(Row) + 'C' + IntToStr(Col);
try RC := ExcelObj.Application.ConvertFormula(A, xlR1C1, xlA1, xlAbsolute);
Result := RC;
except end ;end ;end .
21_ クリップボードへのコピーと貼り付け - タブ区切り形式
クリップボードへのコピーと、クリップボードからの貼り付け操作例です。
データの取得元をファイルにすれば、ファイルからの読み込み、出力先をファイルにすれば、タブ区切り形式テキストでの保存となります。対象がファイルであれば、行または列単位でデータの操作ができます。
図58
図59
図60
図61
図62
[京] と [都] の文字の間にはタブ文字が入っているので、ダブルコーテーションで囲まれて出力される
そうでないと、区切り文字 (デリミタ) のタブと区別がつかなくなる
copy code
unit Unit1;interface uses Windows, Messages, SysUtils, Variants, Classes, Graphics, Controls, Forms,
Dialogs, ExtCtrls, Grids, StdCtrls;
type TForm1 = class (TForm)
StringGrid1: TStringGrid;
Panel1: TPanel;
Button1: TButton;
Button2: TButton;
Button3: TButton;
procedure FormCreate(Sender: TObject);procedure Button1Click(Sender: TObject);procedure Button2Click(Sender: TObject);procedure Button3Click(Sender: TObject);private { Private 宣言 } public { Public 宣言 } end ;var Form1: TForm1;
implementation uses Clipbrd;{$R *.dfm} // =============================================================================// 列幅等を設定// テスト用にデータなしの表示// =============================================================================procedure TForm1.FormCreate(Sender: TObject);begin StringGrid1.DefaultDrawing := True;
StringGrid1.DrawingStyle := gdsThemed;
StringGrid1.Options := StringGrid1.Options - [goEditing];
StringGrid1.Options := StringGrid1.Options + [goDrawFocusSelected];
StringGrid1.Options := StringGrid1.Options + [goColSizing];
StringGrid1.FixedCols := 1;
StringGrid1.FixedRows := 1;
StringGrid1.DefaultColWidth := 70;
StringGrid1.DefaultRowHeight := 20;
// 左端の列幅設定StringGrid1.ColWidths[0] := 18;
// 列数と行数を設定StringGrid1.ColCount := 5;
StringGrid1.RowCount := 30
end ;// =============================================================================// コピー// クリップボードに、現在選択中のセルのデータをコピー// コピーするテキストはタブ形式// タブ形式であれば、エクセルにもセル単位で張り付けられる// このサンプルでは連続したセルのみが対象。飛び飛びのセルは扱わない// // TStringListにデータを格納しているので、(連続した)選択範囲のみの保存も可能// // usesにClipbrdが必要// =============================================================================procedure TForm1.Button1Click(Sender: TObject);var StartRow : Integer;
EndRow : Integer;
StartCol : Integer;
EndCol : Integer;
SL : TStringList;
ColList : TStringList;
i : Integer;
j : Integer;
begin // 現在選択中のセルの左上のセルと右下のセルの行番号と列番号を調査StartRow := StringGrid1.Selection.Top;
EndRow := StringGrid1.Selection.Bottom;
StartCol := StringGrid1.Selection.Left;
EndCol := StringGrid1.Selection.Right;
SL := TStringList.Create;
ColList := TStringList.Create;
// デリミタの設定ColList.Delimiter := Chr(VK_TAB);
ColList.StrictDelimiter := True;
try // 行単位でタブ形式文字列を作成for i := StartRow to EndRow do begin // 一度行全体を指定デリミタの文字列に変換StringGrid1.Rows[i].Delimiter := Chr(VK_TAB);
StringGrid1.Rows[i].StrictDelimiter := True;
ColList.DelimitedText := StringGrid1.Rows[i].DelimitedText;
// 列の処理// 選択されていない列データは削除for j := StringGrid1.ColCount - 1 downto 0 do begin if (j > EndCol) then ColList.Delete(j);if (j < StartCol) then ColList.Delete(j);end ;SL.Add(ColList.DelimitedText);
end ;// クリップボードにコピーif SL.Count >0 then Clipboard.AsText := SL.Text;finally FreeAndNil(SL);
FreeAndNil(ColList);
end ;end ;// =============================================================================// 貼り付け// クリップボードからデータを取得して、現在選択中のセルから貼りつける// エクセル同様、タブ形式の場合にのみ各セルに張り付ける// カンマ形式のデータはセパレータとして認識しない// 現在の列数、行数を超えるデータは張り付けされない// // usesにClipbrdが必要// =============================================================================procedure TForm1.Button2Click(Sender: TObject);var StartRow : Integer;
StartCol : Integer;
SL : TStringList;
ColList : TStringList;
i : Integer;
j : Integer;
begin // 貼り付け開始セルの行と列番号取得StartRow := StringGrid1.Selection.Top;
StartCol := StringGrid1.Selection.Left;
SL := TStringList.Create;
ColList := TStringList.Create;
// クリップボードからデータを取得SL.Text := Clipboard.AsText;
// StringGridの表示更新を停止StringGrid1.Rows[0].BeginUpdate;
try // 1行づつ処理for i := 0 to SL.Count -1 do begin if (i + StartRow) < StringGrid1.RowCount then begin // デリミタの設定ColList.Delimiter := Chr(VK_TAB);
ColList.StrictDelimiter := True;
ColList.DelimitedText := SL[i];
// セル単位でデータ代入for j := 0 to ColList.Count - 1 do begin if (j + StartCol) < StringGrid1.ColCount then begin StringGrid1.Cells[j + StartCol, i + StartRow] := ColList[j];
end ;end ;end ;end ;finally // StringGridの表示更新StringGrid1.Rows[0].EndUpdate;
FreeAndNil(SL);
FreeAndNil(ColList);
end ;end ;// =============================================================================// 固定行、固定列を含め、全て消去// =============================================================================procedure TForm1.Button3Click(Sender: TObject);var i : Integer;
begin for i := 0 to StringGrid1.RowCount -1 do begin StringGrid1.Rows[i].Clear;
end ;end ;end .
セルにチェックボックスを描画する例です。ここでは指定した列だけに表示するようにしています。
図63
図64
マウス左ボタンと [スペース] キー押下でチェック状態をトグル
copy code
unit Unit1;interface uses Windows, Messages, SysUtils, Variants, Classes, Graphics, Controls, Forms,
Dialogs, ExtCtrls, Grids, StdCtrls;
type TForm1 = class (TForm)
Panel1: TPanel;
StringGrid1: TStringGrid;
procedure FormCreate(Sender: TObject);procedure StringGrid1DrawCell(Sender: TObject; ACol, ARow: Integer;Rect: TRect; State: TGridDrawState);
procedure StringGrid1KeyDown(Sender: TObject; var Key: Word;Shift: TShiftState);
procedure StringGrid1MouseDown(Sender: TObject; Button: TMouseButton;Shift: TShiftState; X, Y: Integer);
procedure StringGrid1SelectCell(Sender: TObject; ACol, ARow: Integer;var CanSelect: Boolean);private { Private 宣言 } public { Public 宣言 } end ;var Form1: TForm1;
implementation {$R *.dfm} // =============================================================================// 列幅等を設定// テスト用にデータなしの表示// =============================================================================procedure TForm1.FormCreate(Sender: TObject);begin StringGrid1.DefaultDrawing := True;
StringGrid1.DrawingStyle := gdsThemed;
StringGrid1.Options := StringGrid1.Options - [goEditing];
StringGrid1.Options := StringGrid1.Options - [goDrawFocusSelected];
StringGrid1.Options := StringGrid1.Options + [goRangeSelect];
StringGrid1.Options := StringGrid1.Options + [goColSizing];
StringGrid1.Options := StringGrid1.Options + [goRowSizing];
StringGrid1.FixedCols := 1 ;
StringGrid1.FixedRows := 1 ;
StringGrid1.DefaultColWidth := 45 ;
StringGrid1.DefaultRowHeight := 20 ;
// 列幅設定StringGrid1.ColWidths[0 ] := 88 ;
StringGrid1.ColWidths[2 ] := StringGrid1.DefaultRowHeight + 35 ;
// 列数と行数を設定StringGrid1.ColCount := 6 ;
StringGrid1.RowCount := 5 ;
// テスト表示用のデータをセット// 空表示では寂しいのでStringGrid1.Cells[0 , 0 ] := '' ;
StringGrid1.Cells[1 , 0 ] := '合計点' ;
StringGrid1.Cells[2 , 0 ] := '合否' ;
StringGrid1.Cells[3 , 0 ] := '数学' ;
StringGrid1.Cells[4 , 0 ] := '物理' ;
StringGrid1.Cells[5 , 0 ] := '社会' ;
StringGrid1.Cells[0 , 1 ] := '宮本 武蔵' ;
StringGrid1.Cells[1 , 1 ] := '145' ;
StringGrid1.Cells[2 , 1 ] := '' ;
StringGrid1.Cells[3 , 1 ] := '45' ;
StringGrid1.Cells[4 , 1 ] := '20' ;
StringGrid1.Cells[5 , 1 ] := '80' ;
StringGrid1.Cells[0 , 2 ] := '佐々木 小次郎' ;
StringGrid1.Cells[1 , 2 ] := '230' ;
StringGrid1.Cells[2 , 2 ] := '' ;
StringGrid1.Cells[3 , 2 ] := '100' ;
StringGrid1.Cells[4 , 2 ] := '50' ;
StringGrid1.Cells[5 , 2 ] := '80' ;
StringGrid1.Cells[0 , 3 ] := '沓掛 時次郎' ;
StringGrid1.Cells[1 , 3 ] := '160' ;
StringGrid1.Cells[2 , 3 ] := '' ;
StringGrid1.Cells[3 , 3 ] := '20' ;
StringGrid1.Cells[4 , 3 ] := '50' ;
StringGrid1.Cells[5 , 3 ] := '90' ;
StringGrid1.Cells[0 , 4 ] := '番場 忠太郎' ;
StringGrid1.Cells[1 , 4 ] := '150' ;
StringGrid1.Cells[2 , 4 ] := '' ;
StringGrid1.Cells[3 , 4 ] := '15' ;
StringGrid1.Cells[4 , 4 ] := '45' ;
StringGrid1.Cells[5 , 4 ] := '90' ;
ActiveControl := StringGrid1;
end ;// =============================================================================// StringGrid1のOnDrawCellイベント処理// DrawFrameControl関数を使用してチェックボックスを描画// // このサンプルでは、Objectsプロパティを利用しているが、チェックボックスを表// 示するセルには文字列を描画しないのであれば、セルの値で判定できる// (チェックの時は何か文字を代入、それ以外は空白文字とか)// =============================================================================procedure TForm1.StringGrid1DrawCell(Sender: TObject; ACol, ARow: Integer;Rect: TRect; State: TGridDrawState);
var TempRect : TRect;
BoxRect : TRect;
uState : Cardinal;
StrText : String ;
begin TempRect := Rect;
if (ARow > (TStringGrid(Sender).FixedRows - 1 )) and (ACol = 2 ) then begin // チェックボックスのサイズを設定BoxRect.Left := Rect.Left + 5 ;
BoxRect.Top := Rect.Top + 2 ;
BoxRect.Bottom := Rect.Bottom - 2 ;
BoxRect.Right := BoxRect.Left + (BoxRect.Bottom - BoxRect.Top);
Rect.Right := Rect.Bottom - Rect.Top;
TempRect.Left := TempRect.Left + (BoxRect.Right - BoxRect.Left) + 7 ;
TempRect.Top := TempRect.Top + 2 ;
// Objectsプロパティの値に応じてチェック状態を描画if Bool(TStringGrid(Sender).Objects[ACol, ARow]) then begin TStringGrid(Sender).Canvas.Font.Color := clWindowText;
StrText := '合格' ;
uState := DFCS_BUTTONCHECK or DFCS_CHECKED;
end else begin TStringGrid(Sender).Canvas.Font.Color := clRed;
StrText := '落第' ;
uState := DFCS_BUTTONCHECK;
end ;DrawText(TStringGrid(Sender).Canvas.Handle,
PChar(StrText),
-1 ,
TempRect,
DT_LEFT or DT_SINGLELINE);
DrawFrameControl(TStringGrid(Sender).Canvas.Handle,
BoxRect,
DFC_BUTTON,
uState);
end ;end ;// =============================================================================// StringGrid1のOnMouseDownイベント処理// マウス左ボタン押下でチェック状態をトグルする// =============================================================================procedure TForm1.StringGrid1MouseDown(Sender: TObject; Button: TMouseButton;Shift: TShiftState; X, Y: Integer);
var ACol : Integer;
ARow : Integer;
ABool : Boolean;
begin if Button = mbLeft then begin TStringGrid(Sender).MouseToCell(X, Y, ACol, ARow);
if (ARow > (TStringGrid(Sender).FixedRows - 1 )) and (ACol = 2 ) then begin ABool := Bool(TStringGrid(Sender).Objects[ACol, ARow]);
TStringGrid(Sender).Objects[ACol, ARow] := TObject(not ABool);
end ;end ;end ;// =============================================================================// StringGrid1のOnKeyDownイベント処理// スペースキー押下でもチェック状態をトグルする// =============================================================================procedure TForm1.StringGrid1KeyDown(Sender: TObject; var Key: Word;Shift: TShiftState);
var AColLeft : Integer;
ARowTop : Integer;
ARowBottom : Integer;
i : Integer;
ABool : Boolean;
begin if Key = VK_SPACE then begin // 選択中のセルの範囲を調査AColLeft := TStringGrid(Sender).Selection.Left;
ARowTop := TStringGrid(Sender).Selection.Top;
ARowBottom := TStringGrid(Sender).Selection.Bottom;
// 複数行選択に対応if AColLeft = 2 then begin for i := ARowTop to ARowBottom do begin ABool := Bool(TStringGrid(Sender).Objects[AColLeft, i]);
TStringGrid(Sender).Objects[AColLeft, i] := TObject(not ABool);
end ;end ;end ;end ;// =============================================================================// StringGrid1のOnSelectCellイベント処理// // OptionsプロパティのgoEditingプロパティが有効な場合の対策// チェックボックスを描画している列は編集不可とする// =============================================================================procedure TForm1.StringGrid1SelectCell(Sender: TObject; ACol, ARow: Integer;var CanSelect: Boolean);begin if (ACol = 2 ) then begin TStringGrid(Sender).Options := TStringGrid(Sender).Options - [goEditing];
end else begin TStringGrid(Sender).Options := TStringGrid(Sender).Options + [goEditing];
end ;end ;end .
TStringGrid の Options の
goEditing を True にして実行した場合、チェックボックスをクリックすると、セルの編集状態になるために、チェックボックスが表示しなくなります。この場合は、次のようにコードで編集可否の状態を切り換えることで対処できます。
SelectCell メソッドでは戻り値で、OnSelectCell イベントでは、引数の CanSelect の値を変更することによって、セルが選択できないようにすることもできます。
図65
リスト25
copy code
function TplStringGrid.SelectCell(ACol, ARow: Integer): Boolean;begin if (ACol = 2 ) then begin Options := Options - [goEditing];
end else begin Options := Options + [goEditing];
end ;Result := inherited ;
end ;
リスト26
copy code
procedure TForm1.StringGrid1SelectCell(Sender: TObject; ACol, ARow: Integer;var CanSelect: Boolean);begin if (ACol = 2 ) then begin TStringGrid(Sender).Options := TStringGrid(Sender).Options - [goEditing];
end else begin TStringGrid(Sender).Options := TStringGrid(Sender).Options + [goEditing];
end ;CanSelect := True;
end ;
今度はセルにボタンを描画してみます。上のチェックボックスは DrawFrameControl 関数を使用しましたが、今度は Windows XP 以降のテーマに対応した描画にしてみました。ボタン幅はセル幅と同じで、高さもセルの高さと同じにしています。
ボタンを描画してから文字列を描画します。そうすると、文字列がボタンの Caption のように見えることになります。文字列を描画してからボタンを描画すると、ボタンの幅と高さをセルのそれと同じにしているために、文字列が見えなくなってしまいます。
図66
図67
図68
copy code
unit Unit1;interface uses Windows, Messages, SysUtils, Variants, Classes, Graphics, Controls, Forms,
Dialogs, ExtCtrls, Grids, StdCtrls;
type TForm1 = class (TForm)
Panel1: TPanel;
StringGrid1: TStringGrid;
procedure FormCreate(Sender: TObject);procedure StringGrid1DrawCell(Sender: TObject; ACol, ARow: Integer;Rect: TRect; State: TGridDrawState);
procedure StringGrid1MouseDown(Sender: TObject; Button: TMouseButton;Shift: TShiftState; X, Y: Integer);
procedure StringGrid1SelectCell(Sender: TObject; ACol, ARow: Integer;var CanSelect: Boolean);private { Private 宣言 } public { Public 宣言 } end ;var Form1: TForm1;
implementation uses Themes;
{$R *.dfm} // =============================================================================// 列幅等を設定// テスト用にデータ等を設定// =============================================================================procedure TForm1.FormCreate(Sender: TObject);begin StringGrid1.DefaultDrawing := True;
StringGrid1.DrawingStyle := gdsThemed;
StringGrid1.Options := StringGrid1.Options + [goEditing];
StringGrid1.Options := StringGrid1.Options - [goDrawFocusSelected];
StringGrid1.Options := StringGrid1.Options + [goRangeSelect];
StringGrid1.Options := StringGrid1.Options + [goColSizing];
StringGrid1.Options := StringGrid1.Options + [goRowSizing];
StringGrid1.FixedCols := 1 ;
StringGrid1.FixedRows := 1 ;
StringGrid1.DefaultColWidth := 45 ;
StringGrid1.DefaultRowHeight := 20 ;
// 列幅設定StringGrid1.ColWidths[0 ] := 88 ;
StringGrid1.ColWidths[2 ] := StringGrid1.DefaultRowHeight + 35 ;
// 列数と行数を設定StringGrid1.ColCount := 6 ;
StringGrid1.RowCount := 5 ;
// テスト表示用のデータをセット// 空表示では寂しいのでStringGrid1.Cells[0 , 0 ] := '' ;
StringGrid1.Cells[1 , 0 ] := '合計点' ;
StringGrid1.Cells[2 , 0 ] := '合否' ;
StringGrid1.Cells[3 , 0 ] := '数学' ;
StringGrid1.Cells[4 , 0 ] := '物理' ;
StringGrid1.Cells[5 , 0 ] := '社会' ;
StringGrid1.Cells[0 , 1 ] := '宮本 武蔵' ;
StringGrid1.Cells[1 , 1 ] := '145' ;
StringGrid1.Cells[2 , 1 ] := '' ;
StringGrid1.Cells[3 , 1 ] := '45' ;
StringGrid1.Cells[4 , 1 ] := '20' ;
StringGrid1.Cells[5 , 1 ] := '80' ;
StringGrid1.Cells[0 , 2 ] := '佐々木 小次郎' ;
StringGrid1.Cells[1 , 2 ] := '230' ;
StringGrid1.Cells[2 , 2 ] := '' ;
StringGrid1.Cells[3 , 2 ] := '100' ;
StringGrid1.Cells[4 , 2 ] := '50' ;
StringGrid1.Cells[5 , 2 ] := '80' ;
StringGrid1.Cells[0 , 3 ] := '沓掛 時次郎' ;
StringGrid1.Cells[1 , 3 ] := '160' ;
StringGrid1.Cells[2 , 3 ] := '' ;
StringGrid1.Cells[3 , 3 ] := '20' ;
StringGrid1.Cells[4 , 3 ] := '50' ;
StringGrid1.Cells[5 , 3 ] := '90' ;
StringGrid1.Cells[0 , 4 ] := '番場 忠太郎' ;
StringGrid1.Cells[1 , 4 ] := '150' ;
StringGrid1.Cells[2 , 4 ] := '' ;
StringGrid1.Cells[3 , 4 ] := '15' ;
StringGrid1.Cells[4 , 4 ] := '45' ;
StringGrid1.Cells[5 , 4 ] := '90' ;
ActiveControl := StringGrid1;
end ;// =============================================================================// StringGrid1のOnDrawCellメソッド// TThemeServicesを使用してボタンを描画// =============================================================================procedure TForm1.StringGrid1DrawCell(Sender: TObject; ACol, ARow: Integer;Rect: TRect; State: TGridDrawState);
var LStrText : String ;
LBtnTheme : TThemedButton;
LDetails : TThemedElementDetails;
begin if (ARow > (TStringGrid(Sender).FixedRows - 1 )) and (ACol = 2 ) then begin // フォーカスの有無によってボタンの種類を変更if gdFocused in State then begin LBtnTheme := tbPushButtonPressed;
end else begin LBtnTheme := tbPushButtonNormal;
end ;// ボタンを描画LDetails := ThemeServices.GetElementDetails(LBtnTheme);
ThemeServices.DrawElement(TStringGrid(Sender).Canvas.Handle,
LDetails,
Rect,
nil );// セルの文字列の設定と描画TStringGrid(Sender).Canvas.Font.Color := clBlack;
LStrText := IntToStr(ARow);
SetBkMode(TStringGrid(Sender).Canvas.Handle, TRANSPARENT);
DrawText(TStringGrid(Sender).Canvas.Handle,
PChar(LStrText),
-1 ,
Rect,
DT_VCENTER or DT_CENTER or DT_SINGLELINE);
end ;end ;// =============================================================================// StringGrid1のOnMouseDownイベント処理// OnClickイベントだとセルの移動でも発生してしまうので、こちらで処理// =============================================================================procedure TForm1.StringGrid1MouseDown(Sender: TObject; Button: TMouseButton;Shift: TShiftState; X, Y: Integer);
var LIndex : Integer;
LStrText : String ;
begin if Button = mbLeft then begin if TStringGrid(Sender).Col = 2 then begin LIndex := TStringGrid(Sender).Row;
LStrText := IntToStr(LIndex) + ' 行目のボタンが押されました' ;
MessageBox(Handle, PChar(LStrText), '情報' , MB_ICONINFORMATION);
end ;end ;end ;// =============================================================================// StringGrid1のOnSelectCellイベント処理// // OptionsプロパティのgoEditingプロパティが有効な場合の対策// ボタンを描画している列は編集不可とする// =============================================================================procedure TForm1.StringGrid1SelectCell(Sender: TObject; ACol, ARow: Integer;var CanSelect: Boolean);var LSGOptions : TGridOptions;
begin LSGOptions := StringGrid1.Options;
if (ACol = 2 ) then begin Exclude(LSGOptions, goEditing);
end else begin Include(LSGOptions, goEditing);
end ;StringGrid1.Options := LSGOptions;
end ;end .
24_ セルまたは列、行単位で編集可能、編集禁止とする方法
[21_指定列にチェックボックスを描画] あるいは上のサンプルコードを参考にしてください。
25_ ダブルクリックしたセルの検出と固定セルクリックの検出
TStringGrid のセルをダブルクリックすると、OnDblClick イベントが発生します。
そこで、次のサンプルでは、現在のマウスカーソル位置から TStringGrid の列と行の番号を取得します。そうすることにより、データを格納しているセルだけのダブルクリックを検出します。
[備考]
図69
図70
copy code
unit Unit1;interface uses Windows, Messages, SysUtils, Variants, Classes, Graphics, Controls, Forms,
Dialogs, ExtCtrls, Grids, StdCtrls;
type TForm1 = class (TForm)
Panel1: TPanel;
StringGrid1: TStringGrid;
procedure FormCreate(Sender: TObject);procedure StringGrid1SelectCell(Sender: TObject; ACol, ARow: Integer;var CanSelect: Boolean);procedure StringGrid1DblClick(Sender: TObject);private { Private 宣言 } public { Public 宣言 } end ;var Form1: TForm1;
implementation {$R *.dfm} // =============================================================================// フォーム生成時の処理// すぐにテストできるように、テスト用のデータを各セルにセットしておく// =============================================================================procedure TForm1.FormCreate(Sender: TObject);begin StringGrid1.DefaultDrawing := True;
StringGrid1.DrawingStyle := gdsThemed;
StringGrid1.Options := StringGrid1.Options + [goEditing];
StringGrid1.Options := StringGrid1.Options + [goDrawFocusSelected];
StringGrid1.ColCount := 4 ;
StringGrid1.FixedCols := 1 ;
StringGrid1.DefaultColWidth := 90 ;
// ここまではオブジェクトインスペクタで設定してもよい// 左端の列幅設定StringGrid1.ColWidths[0 ] := 10 ;
// テスト用の値をセットStringGrid1.Cells[1 ,0 ] := '調査番号' ;
StringGrid1.Cells[2 ,0 ] := '都道府県' ;
StringGrid1.Cells[3 ,0 ] := '結果値' ;
// テスト用の値をセットStringGrid1.RowCount := 4 + StringGrid1.FixedRows - 1 ;
StringGrid1.Cells[1 , 1 + StringGrid1.FixedRows - 1 ] := 'A-100' ;
StringGrid1.Cells[1 , 2 + StringGrid1.FixedRows - 1 ] := 'A-200' ;
StringGrid1.Cells[1 , 3 + StringGrid1.FixedRows - 1 ] := 'A-300' ;
StringGrid1.Cells[2 , 1 + StringGrid1.FixedRows - 1 ] := '東京都' ;
StringGrid1.Cells[2 , 2 + StringGrid1.FixedRows - 1 ] := '大阪府' ;
StringGrid1.Cells[2 , 3 + StringGrid1.FixedRows - 1 ] := '京都府' ;
StringGrid1.Cells[3 , 1 + StringGrid1.FixedRows - 1 ] := '500' ;
StringGrid1.Cells[3 , 2 + StringGrid1.FixedRows - 1 ] := '800' ;
StringGrid1.Cells[3 , 3 + StringGrid1.FixedRows - 1 ] := '300' ;
end ;// =============================================================================// TStringGridのOnSelectCellイベント// セルが選択されたら、そのセルの値を表示// 固定セルでは発生しない// =============================================================================procedure TForm1.StringGrid1SelectCell(Sender: TObject; ACol, ARow: Integer;var CanSelect: Boolean);begin Panel1.Caption := StringGrid1.Cells[ACol, ARow];
end ;// =============================================================================// TStringGridのOnDblClickイベント// ダブルクリックしたら、そのセルの列と行番号を表示// // OptionsにgoRowSelectをFalseにしておく// =============================================================================procedure TForm1.StringGrid1DblClick(Sender: TObject);var MousePos : TPoint;
PosInGrid : TPoint;
ACol : Integer;
ARow : Integer;
StrText : String ;
begin // マウスカーソル位置をTStringGrid内の位置に変換GetCursorPos(MousePos);
PosInGrid := StringGrid1.ScreenToClient(MousePos);
// マウスカーソル位置の列と行番号を取得StringGrid1.MouseToCell(PosInGrid.X, PosInGrid.Y, ACol, ARow);
// データのセルだったら列と行の番号を文字列に変換if (ACol >= StringGrid1.FixedCols) and (ARow >= StringGrid1.FixedRows) then begin StrText := IntToStr(ACol) + ' 列目 ' + sLineBreak + IntToStr(ARow) + ' 行目' ;
// 編集状態を解除StringGrid1.EditorMode := False;
end else begin StrText := 'データセル以外です' ;
end ;// 結果を表示MessageBox(Handle, PChar(StrText), '情報' , MB_OK);
end ;end .
TStringGrid のセルの文字列を検索するサンプルです。
[備考]
図71
図72
copy code
unit Unit1;interface uses Windows, Messages, SysUtils, Variants, Classes, Graphics, Controls, Forms,
Dialogs, ExtCtrls, Grids, StdCtrls;
type TForm1 = class (TForm)
Panel1: TPanel;
StringGrid1: TStringGrid;
Edit1: TEdit;
Button1: TButton;
procedure FormCreate(Sender: TObject);procedure StringGrid1DrawCell(Sender: TObject; ACol, ARow: Integer;Rect: TRect; State: TGridDrawState);
procedure Button1Click(Sender: TObject);private { Private 宣言 } public { Public 宣言 } end ;var Form1: TForm1;
implementation {$R *.dfm} // =============================================================================// フォーム生成時の処理// すぐにテストできるように、テスト用のデータを各セルにセットしておく// =============================================================================procedure TForm1.FormCreate(Sender: TObject);begin StringGrid1.DefaultDrawing := True;
StringGrid1.DrawingStyle := gdsThemed;
StringGrid1.Options := StringGrid1.Options + [goEditing];
StringGrid1.Options := StringGrid1.Options + [goDrawFocusSelected];
StringGrid1.ColCount := 4 ;
StringGrid1.FixedCols := 1 ;
StringGrid1.DefaultColWidth := 90 ;
// ここまではオブジェクトインスペクタで設定してもよい// 左端の列幅設定StringGrid1.ColWidths[0 ] := 10 ;
// テスト用の値をセットStringGrid1.Cells[1 ,0 ] := '列 1' ;
StringGrid1.Cells[2 ,0 ] := '列 2' ;
StringGrid1.Cells[3 ,0 ] := '列 3' ;
// テスト用の値をセットStringGrid1.RowCount := 4 + StringGrid1.FixedRows - 1 ;
StringGrid1.Cells[1 , 1 + StringGrid1.FixedRows - 1 ] := '100' ;
StringGrid1.Cells[1 , 2 + StringGrid1.FixedRows - 1 ] := '200' ;
StringGrid1.Cells[1 , 3 + StringGrid1.FixedRows - 1 ] := '200' ;
StringGrid1.Cells[2 , 1 + StringGrid1.FixedRows - 1 ] := '110' ;
StringGrid1.Cells[2 , 2 + StringGrid1.FixedRows - 1 ] := '150' ;
StringGrid1.Cells[2 , 3 + StringGrid1.FixedRows - 1 ] := '200' ;
StringGrid1.Cells[3 , 1 + StringGrid1.FixedRows - 1 ] := '200' ;
StringGrid1.Cells[3 , 2 + StringGrid1.FixedRows - 1 ] := '100' ;
StringGrid1.Cells[3 , 3 + StringGrid1.FixedRows - 1 ] := '110' ;
// 検索する文字列をセットEdit1.Text := '200' ;
end ;// =============================================================================// Edit1と同じ値のセルを検索// =============================================================================procedure TForm1.Button1Click(Sender: TObject);var ACount : Integer;
iCol : Integer;
iRow : Integer;
SearchText : String ;
StrText : String ;
begin // 描画更新の一時停止StringGrid1.Cols[0 ].BeginUpdate;
ACount := 0 ;
try // 実際のセルの文字列の検索// 単にセルの文字列を比較するだけSearchText := Edit1.Text;
for iCol := StringGrid1.FixedCols to StringGrid1.ColCount - 1 do begin for iRow := StringGrid1.FixedRows to StringGrid1.RowCount - 1 do begin if StringGrid1.Cells[iCol, iRow] = SearchText then begin // 検索結果が一致したら、Objectsプロパティに1を代入StringGrid1.Objects[iCol, iRow] := TObject(1 );
Inc(ACount);
end else begin // 検索結果が一致しない場合はObjectsプロパティの値をnilにするStringGrid1.Objects[iCol, iRow] := nil ;
end ;end ;end ;finally // 描画更新を再開StringGrid1.Cols[0 ].EndUpdate;
end ;Edit1.SetFocus;
if ACount = 0 then begin StrText := '検索文字列は見つかりませんでした' ;
MessageBox(Handle, PChar(StrText), '結果' , MB_ICONINFORMATION);
end ;end ;// =============================================================================// OnDrawCellイベント// Objectsプロパティの値が1ならば背景を塗り潰す// =============================================================================procedure TForm1.StringGrid1DrawCell(Sender: TObject; ACol, ARow: Integer;Rect: TRect; State: TGridDrawState);
begin if Integer(StringGrid1.Objects[ACol, ARow]) = 1 then begin StringGrid1.Canvas.Brush.Color := clMoneyGreen;
StringGrid1.Canvas.FillRect(Rect);
StringGrid1.Canvas.TextRect(Rect, Rect.Left+2 , Rect.Top+2 ,
StringGrid1.Cells[ACol, ARow]);
end ;end ;end .
文字列も比較演算子 (関係演算子) が使用できます。
図73
copy code
StrCell := StringGrid1.Cells[iCol, iRow];
if (StrCell > '100' ) and (StrCell < '200' ) then begin // 検索結果が一致したら、Objectsプロパティに1を代入StringGrid1.Objects[iCol, iRow] := TObject(1 );
Inc(ACount);
end else begin // 検索結果が一致しない場合はObjectsプロパティの値をnilにするStringGrid1.Objects[iCol, iRow] := nil ;
end ;
27_ セルの編集終了 ( 入力終了 ) イベントの実装
TStringGrid のセルの編集終了イベントの実装と、その使用例です。
セルの編集を開始すると、インプレイスエディタが起動します。[Enter] キーの押下や、編集中に別のセルに移動すると、インプレイスエディタは EN_KILLFOCUS という通知メッセージを発行します。このメッセージを検出してイベントのコードを実行します。
セルの編集終了のイベントが実装されていれば、下記のリンクの山本隆さんのサンプルのように、入力規則を設定したセルで、入力に間違いがあった場合に、ユーザに再入力を促すことができます。
何を入力するのかは、実際に入力する人だけが知っていることです。したがって、「入力の終了」を検出することはできません。例えばセルに 123 と表示されているとします。これで入力が終わったのか、それともその後にまだ何か入力するのかは、入力している人にしか分かりません。
[備考]
図74
図75
図76
リスト30
copy code
unit Unit1;interface uses Windows, Messages, SysUtils, Variants, Classes, Graphics, Controls, Forms,
Dialogs, ExtCtrls, Grids, StdCtrls;
type TplStringGrid = class (TStringGrid)
private FEditCol : LongInt;
FEditRow : LongInt;
FEditValue : String ;
FOnEndEditText : TSetEditEvent;
protected procedure WMCommand(var Message: TWMCommand); message WM_COMMAND;procedure SetEditText(ACol: Integer; ARow: Integer; const Value: string );override ;public constructor Create(AOwner: TComponent); override ;property OnEndEditText : TSetEditEvent read FOnEndEditText write FOnEndEditText;end ;TForm1 = class (TForm)
StringGrid1: TStringGrid;
Panel1: TPanel;
procedure FormCreate(Sender: TObject);procedure StringGrid1GetEditText(Sender: TObject; ACol, ARow: Integer;var Value: string );procedure FormCloseQuery(Sender: TObject; var CanClose: Boolean);private { Private 宣言 } plStringGrid1 : TplStringGrid;
procedure EndEditEvent(Sender: TObject; ACol, ARow: LongInt; const Value: string );public { Public 宣言 } end ;var Form1: TForm1;
implementation uses plChgCompo;{$R *.dfm} // =============================================================================// すぐにテストできるように、列数と列幅等を設定// テスト用のデータセット// イベント用のメソッドを設定// =============================================================================procedure TForm1.FormCreate(Sender: TObject);begin // フォーム作成時にコンポーネントの入れ替えplStringGrid1 := TplStringGrid(ChangeComponent(StringGrid1, TplStringGrid));
plStringGrid1.DefaultDrawing := True;
plStringGrid1.Options := StringGrid1.Options + [goEditing];
plStringGrid1.Options := StringGrid1.Options + [goDrawFocusSelected];
// イベント用のメソッドを設定plStringGrid1.OnEndEditText := EndEditEvent;
plStringGrid1.FixedCols := 1 ;
plStringGrid1.FixedRows := 1 ;
plStringGrid1.ColCount := 4 ;
plStringGrid1.RowCount := 4 ;
plStringGrid1.DefaultColWidth := 80 ;
// 左端の列幅設定plStringGrid1.ColWidths[0 ] := 10 ;
// テスト用の値をセット(固定行)plStringGrid1.Cells[1 ,0 ] := '調査番号' ;
plStringGrid1.Cells[2 ,0 ] := '都道府県' ;
plStringGrid1.Cells[3 ,0 ] := '結果値' ;
// テスト用の値をセットplStringGrid1.Cells[1 ,1 ] := 'A-100' ;
plStringGrid1.Cells[1 ,2 ] := 'A-200' ;
plStringGrid1.Cells[1 ,3 ] := 'A-300' ;
plStringGrid1.Cells[2 ,1 ] := '東京都' ;
plStringGrid1.Cells[2 ,2 ] := '大阪府' ;
plStringGrid1.Cells[2 ,3 ] := '京都府' ;
plStringGrid1.Cells[3 ,1 ] := '500' ;
plStringGrid1.Cells[3 ,2 ] := '800' ;
plStringGrid1.Cells[3 ,3 ] := '300' ;
end ;// =============================================================================// フォームを閉じる時の処理// // テストなので入力のチェックはしないで終了させる// そのためには、編集終了のイベントを無効にする// =============================================================================procedure TForm1.FormCloseQuery(Sender: TObject; var CanClose: Boolean);begin plStringGrid1.OnEndEditText := nil ;
// 以下のコードにすれば、終了時にも入力チェックが可能// if (plStringGrid1.EditorMode) then begin// if (Assigned(plStringGrid1.OnEndEditText)) then begin// plStringGrid1.EditorMode := False;// CanClose := False;// end;// end;end ;// =============================================================================// StringGrid1のOnGetEditTextイベント// セルの編集開始時に実行される// Valueは編集前のセルの値// =============================================================================procedure TForm1.StringGrid1GetEditText(Sender: TObject; ACol, ARow: Integer;var Value: string );begin Panel1.Caption := '' ;
end ;// =============================================================================// TplStringGridのOnEndEditTextイベント用のメソッド// セルの編集が終了すると発生する// 空白の入力を禁止する場合のコード例// // OnEndEditTextイベントの型はTSetEditEvent// 引数の型と順序は、Grids.pas内のTSetEditEventの定義と同じにする// =============================================================================procedure TForm1.EndEditEvent(Sender: TObject; ACol, ARow: LongInt;const Value: string );begin // 編集終了時のセルの値を表示Panel1.Caption := Value;
// 第2列目だけは空白入力を禁止するif ACol = 2 then begin if Trim(Value) = '' then begin if (plStringGrid1.Col <> ACol) or (plStringGrid1.Row <> ARow) then begin plStringGrid1.Col := ACol;
plStringGrid1.Row := ARow;
end else begin plStringGrid1.Col := ACol;
plStringGrid1.Row := ARow;
MessageBox(0 , '入力が空白です' , '警告' , MB_ICONWARNING);
end ;// 以下を削除すれば、空白を許可したまま次の入力が可能となるplStringGrid1.EditorMode := True;
end ;end ;end ;{ TplStringGrid } // -----------------------------------------------------------------------------// クラス生成時の処理// 編集終了イベントに渡す引数の値を初期化// -----------------------------------------------------------------------------constructor TplStringGrid.Create(AOwner: TComponent);begin inherited Create(AOwner);FEditCol := 0 ;
FEditRow := 0 ;
FEditValue := '' ;
end ;// -----------------------------------------------------------------------------// セルの編集開始と編集中に自動で実行されるメソッド// -----------------------------------------------------------------------------procedure TplStringGrid.SetEditText(ACol, ARow: Integer; const Value: string );begin FEditCol := ACol;
FEditRow := ARow;
FEditValue := Value;
inherited SetEditText(ACol, ARow, Value);end ;// -----------------------------------------------------------------------------// WM_COMMANDで通知メッセージを処理する// FEditCol : 編集終了セルの列番号(0ベース)// FEditRow : 編集終了セルの行番号(0ベース)// FEditValue : 編集終了時セルの値// -----------------------------------------------------------------------------procedure TplStringGrid.WMCommand(var Message: TWMCommand);begin if (InplaceEditor <> nil ) and (Message.Ctl = InplaceEditor.Handle) then begin case Message.NotifyCode of EN_KILLFOCUS :
begin if Assigned(FOnEndEditText) then begin FOnEndEditText(Self, FEditCol, FEditRow, FEditValue);
end ;end ;end ;// 終了時はインプレイスエディタも終了させる// この処理をしないとセル編集中の時にアプリが正常終了しないif Message.Msg = WM_DESTROY then begin InplaceEditor.Destroy;
end ;end ;inherited ;end ;end .
セルのプロパティのような機能を実装するには、セルのプロパティとして設定する項目をメンバーとしたレコード型、あるいはクラスを作成します。
29_ ちらつき防止と再描画の制御 - BeginUpdate と EndUpdate
本ページのサンプルで、次のように BeginUpDate と EndUpdate を使用しているものがあります。
TStringGrid の Rows プロパティの型も Cols プロパティの型も TStrings です。
StringGrid1.Rows[0].BeginUpdate;
// セルに対する操作StringGrid1.Rows[0].EndUpdate;
以下のような WM_SETREDRAW メッセージも再描画の抑制に使用できますが、このメッセージによる処理は多少時間がかかるようです。
SendMessage(StringGrid1.Handle, WM_SETREDRAW, 0, 0);
// セルに対する操作SendMessage(StringGrid1.Handle, WM_SETREDRAW, 1, 0);
